Xcode나 android studio를 설치할 필요가 없는 방식으로 바로 실행해 보길 원하는 경우에 이용합니다.
이때 Expo 를 이용하면, android studio, Xcode 가 필요없이 개발 진행을 도와주고, Expo Clint로 테스트도 가능합니다.
2. React-native 명령어를 이용하는 방법 이전 react native를 사용하는 보통의 개발 방법입니다. CRNA가 2017년 나왔으며 앞으로는 CRNA를 권장할 가능성이 있습니다. react-native 명령어를 이용하는 방법은 iOS 개발을 위해 Mac이 꼭 필요합니다.
2-1. CRNA (Create-react-native-app)를 이용하는 경우, 설치
-- CRNA 설치

$ npm install -g create-react-native-app

-- 프로젝트를 생성합니다.

$ create-react-native-app 프로젝트명
$ cd 프로젝트 명
$ npm start
예)
private int mPrivate;

int mPackagePrivate;

protected int mProtected;
나. Static field 는 s로 시작
예) private static MyClass sSingleton;
다. 나머지는 소문자로 시작.
예) public int publicField;
라. Public static final fields (상수) 는 모두 대문자로 ALL_CAPS_WITH_UNDERSCORES.
예) public static final int SOME_CONSTANT = 42;
public class MyClass {

	public static final int SOME_CONSTANT = 42;

	public int publicField;

	private static MyClass sSingleton;

	int mPackagePrivate;

	private int mPrivate;

	protected int mProtected;

}
시작 중괄호는 "{" 따로 한줄을 차지하지 않는다.
class MyClass {

	int func() {

		if (something) {

			// ...

		} else if (somethingElse) {

			// ...

		} else {

			// ...

		}
	}
}
if (condition) body();
TODO 주석문 또는 FIXME 주석문을 사용 할 것.
단기처방이나, 완벽하지 않은 해결책인 경우에는 반드시 TODO or FIXME주석문을 기입할 것.
// TODO: UrlTable2

또는

// FIXME: flag
Activity 개발 시 주의 사항
context를 별도 멤버로 선언하고 관리하지 않도록 하자.
context가 필요하면 getContext() 를 사용하자.
잘못된 사례
아래 예시는 잘못된 예시입니다.

public class MyActivity extends Activity {

	private Context mContext = null;

	...

	...

	protected void onCreated(Bundle savedInstanceState){

	mContext = this;

}
JavaTests Style Rules
테스트 방법 명명 규칙 준수
Test Method 의 이름을 설계할 때, test case를 "_" 뒤에 붙여줄 수 있다.
하나의 예시일뿐이며 해당 내용에 대한 작업 플로우는 아래 참고URL이 있으니 확인해 보시길 바랍니다.
Git을 사용하기 위한 세팅을 마친 "A책임"와 "B선임"는 서로 나뉘어서 코딩을 하기로 했습니다.
1. 20XX년 04월 01일, "A책임"과 "B선임"이 각각 브랜치를 땁니다.
"A책임"는 "main 페이지"를 만들기 위해 ‘feature/A-source’이란 이름으로, "B선임"는 "register 페이지"를 만들기 위해 ‘feature/B-source’ 이란 이름으로 "orgin/prod" 브랜치의 최신 커밋으로부터 새로운 브랜치를 만들었습니다.
* 브랜치 앞에 ‘feature/‘처럼 슬래시로 구분된 이름을 달아주면 이 구분별로 브랜치를 묶어볼 수 있는 장점이 있습니다.
2. "A책임"와 "B선임"은 각자 브랜치에서 코딩을 합니다.
3. 20XX년 04월 05일 - A책임 : ‘feature/A-source’ 1차 작업 완료, "Pull Request"
시간이 흘러 "A책임"이 main 페이지를 다 만들어 "orgin/dev" 에 ‘feature/A-source’ 브랜치를 merge 할려고 합니다. 하지만 "예고 없이" 바로 합치기 보다는 "B선임"에게 리뷰를 먼저 받고 합치고 싶습니다. * 그러기 위해서 사용하는 것이 "Pull Request" 입니다. (git의 기능이 아니고 github에서 제공하는 기능입니다.)
"Github저장소"에 있는 "Pull Request" 버튼을 눌러 ‘feature/A-source’에서 "orgin/dev" 브랜치로 Pull Request(땡김 요청)를 보냅니다. * 즉, "feature/A-source"에 소스를 수정해놨으니 "orgin/dev" 브랜치에서 땡겨가라고 요청하는 것입니다.
5. 20XX년 04월 05일 - 배포담당자 : "Pull Requests"로 요청한 내용 확인 후 "Merge pull request"로 "orgin/dev"에 merge
그럼 GitHub저장소의 ‘Pull requests’섹션에서 "A책임"이 보낸 "Pull Request" 를 확인할 수 있습니다. Files changed를 보고 잘 만들었는지 여부를 확인하고, 잘 되었다면 ‘Merge pull request’를 눌러 "A책임"의 커밋들을 "orgin/dev" 브랜치에 합칩니다. 원하는게 아니라고 생각되면 거부할 수도 있습니다.
그 와중에 "B선임"도 "register 페이지" 작업을 마치고 "orgin/dev" 브랜치에 "Pull Request"를 보내려 보니 "A책임"의 새로운 코드가 추가(20XX년 04월 05일)되어 "이책임"이 처음에 땄던 "orgin/dev" 커밋(20XX년 04월 01일)와 상태가 달라졌습니다.
* "B선임"이 만든 소스는 'orgin/dev'에서 2020년 04월 01일에 브랜치를 땄기 때문에 옛날 버전이 되었습니다. * "A책임"이 2020년 04월 05일 'orgin/dev'에 소스를 추가하였기 때문입니다.
7. 20XX년 04월 06일 - B선임 : 'orgin/dev'의 소스를 자신의 "feature/B-source" 에 merge
"B선임"은 ‘선-merge 후-pull request’를 보냈습니다. 자신의 local 'feature/B-source'에 'orgin/dev'의 최신 커밋을 마우스 오른쪽 버튼을 눌러 Merge하였습니다. 그랬더니 Merge Conflicts(Merge 충돌) 이 났습니다.
"A책임"와 "B선임" 둘 다 같은 소스를 고치다 보니 충돌이 났습니다. 코드를 보니 "B선임"의 코드가 맞다고 합니다. 수동으로 "A책임"의 코드를 지우고 "B선임"의 코드를 남겨 commit+push 합니다. * marge compare 를 통해서 해당 부분을 체크해서 merge 처리 합니다.
9. 2020년 04월 06일 - 이제 "B선임"도 "orgin/dev"로 "Pull request"를 보내고 배포관리자는 merge합니다.
"A책임"이 확인하고 "merge"하니 오류가 없습니다. "이책임"의 "feature/B-source"에는 "orgin/dev"의 코드도 잘 섞여있는 버전이 들어가 있기 때문입니다.
10. 이제 "orgin/dev"에 "A책임"의 "main 페이지" 와 "B책임"의 ‘"register 페이지"가 모두 반영되었습니다.
11. 배포를 위해 "orgin/dev"에서 "orgin/master" 브랜치로 "pull request"를 보내고 "배포관리자"는 merge 합니다.
YouTube API에서 썸네일을 업로드할려고 하는데 자꾸 forbidden 에러가 뜹니다.
처음에는 인증이 잘못되어서 그런 것인줄 알았는데 순전히 퍼미션 에러 였습니다.
그래서 퍼미션 권한을 부여해주니 에러없이 업로드 가 되었습니다.
"맞춤 동영상 미리보기 이미지 만들기"는 해당 계정에서 이를 확인해줬거나 실시간 스트리밍 액세스 권한이 있는 경우에만 동영상 업로드를 위한 "맞춤 미리보기 이미지"를 업로드 할 수 있습니다.
The authenticated user doesnt have permissions to upload and set custom video thumbnails.
"인증 된 사용자에게는 맞춤 동영상 미리보기 이미지를 업로드하고 설정할 수있는 권한이 없습니다"
You chose 비디오아이디 to upload a thumbnail.
Video files from /Users/jaehonghan/dev/youtubeUploadFiles:
 0 = 20200402.png
Choose the number of the video file you want to upload: 0
You chose /Users/jaehonghan/dev/youtubeUploadFiles/20200402.png to upload.
Initiation Started
Initiation Completed
GoogleJsonResponseException code: 403 : The authenticated user doesnt have permissions to upload and set custom video thumbnails.
com.google.api.client.googleapis.json.GoogleJsonResponseException: 403 Forbidden
{
  "code" : 403,
  "errors" : [ {
    "domain" : "youtube.thumbnail",
    "location" : "Authorization",
    "locationType" : "header",
    "message" : "The authenticated user doesnt have permissions to upload and set custom video thumbnails.",
    "reason" : "forbidden"
  } ],
  "message" : "The authenticated user doesnt have permissions to upload and set custom video thumbnails."
}
	at com.google.api.client.googleapis.json.GoogleJsonResponseException.from(GoogleJsonResponseException.java:150)
	at com.google.api.client.googleapis.services.json.AbstractGoogleJsonClientRequest.newExceptionOnError(AbstractGoogleJsonClientRequest.java:113)
	at com.google.api.client.googleapis.services.json.AbstractGoogleJsonClientRequest.newExceptionOnError(AbstractGoogleJsonClientRequest.java:40)
	at com.google.api.client.googleapis.services.AbstractGoogleClientRequest.executeUnparsed(AbstractGoogleClientRequest.java:432)
	at com.google.api.client.googleapis.services.AbstractGoogleClientRequest.executeUnparsed(AbstractGoogleClientRequest.java:352)
	at com.google.api.client.googleapis.services.AbstractGoogleClientRequest.execute(AbstractGoogleClientRequest.java:469)
	at com.tubro.youtube.thumbnails.test.ThumbnailsSetTest.main(ThumbnailsSetTest.java:124)

Process finished with exit code 0
Contiune 버튼을 클릭하시면 해당 계정에 대한 퍼미션 인증에 대한 것들이 뜨게 됩니다.
아래 이미지에서 Custom thumbnails 가 Enabled가 뜨는 것을 확인할 수 있습니다.
만약에 아래와 같은 화면이 뜨지 않더라도 당황하지 마시고 퍼미션을 얻기 위해 버튼을 클릭해 주세요.
저 같은 경우에도 휴대폰이나 이메일 주소 인증을 통해서 실제 해당 계정에 대한 권한을 갖기 위한 확인 절차를 거쳤습니다.
휴대폰번호를 입력하고 나니 직접 구글에서 연락이 오더라구요.
영어로 막 얘기를 하는데 ARS이니 그냥 듣고 계시다가 6자리 확인 숫자를 불러주니 그걸 잘 들으시고 입력해 주시면 됩니다.
(한국어가 아닌 영어이니 원,투,쓰리 로 말하니 잘 들으세요 ..ㅋㅋㅋ)
인증을 거치고 나서 퍼미션 권한을 획득 하시고 나서 다시 실행 해보세요.
Thumbnail이 제대로 올라가는 것을 확인하실 수 있을 것입니다.
SLF4J: Class path contains multiple SLF4J bindings.
SLF4J: Found binding in [jar:file:/Users/jaehonghan/.m2/repository/ch/qos/logback/logback-classic/1.2.3/logback-classic-1.2.3.jar!/org/slf4j/impl/StaticLoggerBinder.class]
SLF4J: Found binding in [jar:file:/Users/jaehonghan/.m2/repository/org/slf4j/slf4j-log4j12/1.7.30/slf4j-log4j12-1.7.30.jar!/org/slf4j/impl/StaticLoggerBinder.class]
SLF4J: See http://www.slf4j.org/codes.html#multiple_bindings for an explanation.
SLF4J: Actual binding is of type [ch.qos.logback.classic.util.ContextSelectorStaticBinder]

You chose "비디오아이디" to upload a thumbnail.
Video files from /Users/jaehonghan/dev/youtubeUploadFiles:
 0 = 20200402.png
Choose the number of the video file you want to upload: 0
You chose /Users/jaehonghan/dev/youtubeUploadFiles/20200402.png to upload.
Initiation Started
Initiation Completed
Upload Completed!

================== Uploaded Thumbnail ==================

  - Url: https://i.ytimg.com/vi/비디오아이디/default.jpg

Process finished with exit code 0
insert into user (Host,User,authentication_string,ssl_cipher,x509_issuer,x509_subject) values ('localhost','유저명', '', '','','');
insert into user (Host,User,authentication_string,ssl_cipher,x509_issuer,x509_subject) values ('localhost','유저명', '', '','','');
위와 같이 MySQL5.X버전의 경우와 같은 SQL문으로 user를 생성하지마세요.
유저가 생성되지 않습니다.
그럼 mysql에 user를 만들어 비밀번호를 반영하여 접속하는 방법을 설명하겠습니다.
먼저 MySQL에 root로 접속하신 후 mysql DB 이동해 주세요.
0. MySQL에 root로 접속하여 mysql DB 로 이동해 주세요.
use mysql;
1. 사용자 정보 조회를 먼저 조회하세요.
SELECT user,authentication_string,plugin,host FROM mysql.user;
SELECT user,authentication_string,plugin,host FROM mysql.user;
그러면 위와 같이 뜨게 됩니다.
단, plugin 부분이 "caching_sha2_password" 로 되어서 암호화된 비밀번호의 형태가 다를 수 있습니다.
위의 경우에는 제가 "mysql_native_password" 로 변경한 것이기 때문입니다.
여전히 MySQL 클라이언트에서는 "caching_sha2_password" 플러그인이 반영되지 않아서 connect 가 안되기에 기존에 사용하던 "mysql_native_password" 로 변경하였기 때문입니다.
이 부분에 대해서는 아래에 변경하는 방법을 적어놨습니다.
2. 사용자 생성를 생성합니다. create user '유저명'@'localhost' identified by '비밀번호';
create user '유저명'@'localhost' identified by '비밀번호';
3. 생성된 사용자를 확인합니다. SELECT user,authentication_string,plugin,host FROM mysql.user;
SELECT user,authentication_string,plugin,host FROM mysql.user;
4. 생성된 사용자의 권한을 적용시켜 줍니다. GRANT ALL PRIVILEGES ON *.* TO '유저명'@'localhost'; GRANT GRANT OPTION ON *.* TO '유저명'@'localhost';
GRANT ALL PRIVILEGES ON *.* TO '유저명'@'localhost';
GRANT GRANT OPTION ON *.* TO '유저명'@'localhost';
5. MySQL에 실시간 반영시켜 줍니다. flush privileges;
flush privileges;
참고. MySQL에서 caching_sha2_password 을 mysql_native_password으로 플러그인을 변경하기
ALTER user '유저명'@'localhost' IDENTIFIED WITH mysql_native_password by '비밀번호';
ALTER user '유저명'@'localhost' IDENTIFIED WITH mysql_native_password by '비밀번호';
여전히 MySQL 클라이언트에서는 "caching_sha2_password" 플러그인이 반영되지 않아서 connect 가 안되기에 기존에 사용하던 "mysql_native_password" 로 변경하였기 때문입니다.
6. 사용자를 삭제할 수 있습니다. drop user 유저명@localhost;
drop user 유저명@localhost;
flush privileges;
삭제하고 나면 꼭 "flush privileges;" 를 해주세요. MySQL에 제대로 반영을 시켜줘야 합니다.
그렇지 않으면 메모리상에 USER 정보가 남아 있어 동일한 "유저명" 으로 재생성할 수 없습니다.
예를 들어 아래와 같이 SQL문중 delete 문으로 유저를 삭제하고서 다시 동일한 유저를 생성하게 되면 에러가 뜨게 됩니다.
ERROR 1396 (HY000): Operation 관련 에러가 뜨게 됩니다.
mysql> delete from user where User='유저명';

Query OK, 1 row affected (0.00 sec)


mysql> create user '유저명'@'localhost' identified by '비밀번호';

ERROR 1396 (HY000): Operation CREATE USER failed for '유저명'@'localhost'
mysql> delete from user where User='유저명';
Query OK, 1 row affected (0.00 sec)
mysql> create user '유저명'@'localhost' identified by '비밀번호';
ERROR 1396 (HY000): Operation CREATE USER failed for '유저명'@'localhost'
아래는 실제 에러가 떠서 "Drop User " 명령문으로 삭제하고 CREATE USER 명령문으로 재 생성한 화면입니다.
jaeui-MacBookPro:~ jaehonghan$ brew services start mysql
==> Successfully started `mysql` (label: homebrew.mxcl.mysql)
jaeui-MacBookPro:~ jaehonghan$ brew services list
Name    Status  User       Plist
emacs   stopped
mysql   started jaehonghan /Users/jaehonghan/Library/LaunchAgents/homebrew.mxcl.mysql.plist
unbound stopped
MySQL 실행 및 ROOT 비밀번호 설정
내 환경설정 파일에 PATH를 설정해 주세요. mysql 부분을 설정하시고 저장하세요.
$ vi ~/.bash_profile
$ vi ~/.bash_profile


# mysql 설정부분
export PATH="/usr/local/opt/mysql/bin:$PATH"
export LDFLAGS="-L/usr/local/opt/mysql/lib"
export CPPFLAGS="-I/usr/local/opt/mysql/include"


:wq
시작해서 SUCCESS! 메세지가 뜨면 mysql서버에 접속해 봅니다. (비밀번호 없이 접속이 가능합니다.)
$mysql -uroot
jaeui-MacBookPro:~ jaehonghan$ mysql.server start
Starting MySQL
 SUCCESS!

// Ctrl+ C 를 눌러주세요. 백그라운드로 실행되니 안심하세요.

jaeui-MacBookPro:~ jaehonghan$ mysql -uroot
Welcome to the MySQL monitor.  Commands end with ; or \g.
Your MySQL connection id is 8
Server version: 8.0.19 Homebrew

Copyright (c) 2000, 2020, Oracle and/or its affiliates. All rights reserved.

Oracle is a registered trademark of Oracle Corporation and/or its
affiliates. Other names may be trademarks of their respective
owners.

Type 'help;' or '\h' for help. Type '\c' to clear the current input statement.

mysql> exit
MySQL ROOT 비밀번호 설정
1. mysql.server start명령어로 MySQL 서버를 실행시킵니다.
2. mysql_secure_installation명령어로 MySQL ROOT비밀번호를 설정합니다.
Would you like to setup VALIDATE PASSWORD component?(비밀번호 가이드 설정에 대한 질문) yes: 복잡한 비밀번호 no: 쉬운 비밀번호 --> 쉬운 비밀번호로 세팅해주세요.
Remove anonymous users? (Press y|Y for Yes. any other key for No)(사용자 설정에 관한 질문) yes: 접속시 -u 옵션필요 no: 접속시 -u 옵션 불필요
Disallow root login remotely? (Press y|Y for Yes, any other key for No)(다른 IP에서 root 아이디로 원격접속을 설정) yes: 원격접속 불가능 no: 원격접속 가능
Remove test database and access to it? (Press y|Y for Yes, any other key for No)(테스트 데이터베이스 설정) yes: 테스트 데이터베이스 제거 no: 테스트 데이터베이스 유지
Reload privilege tables now? (Press y|Y for Yes, any other key for No)(변경된 권한을 테이블에 적용) yes: 적용 no: 미적용
$ mysql_secure_installation

Securing the MySQL server deployment.

Connecting to MySQL using a blank password.

VALIDATE PASSWORD COMPONENT can be used to test passwords
and improve security. It checks the strength of password
and allows the users to set only those passwords which are
secure enough. Would you like to setup VALIDATE PASSWORD component?

Press y|Y for Yes, any other key for No: N
Please set the password for root here.

New password:

Re-enter new password:
By default, a MySQL installation has an anonymous user,
allowing anyone to log into MySQL without having to have
a user account created for them. This is intended only for
testing, and to make the installation go a bit smoother.
You should remove them before moving into a production
environment.

Remove anonymous users? (Press y|Y for Yes, any other key for No) : Y
Success.


Normally, root should only be allowed to connect from
'localhost'. This ensures that someone cannot guess at
the root password from the network.

Disallow root login remotely? (Press y|Y for Yes, any other key for No) : Y
Success.

By default, MySQL comes with a database named 'test' that
anyone can access. This is also intended only for testing,
and should be removed before moving into a production
environment.


Remove test database and access to it? (Press y|Y for Yes, any other key for No) : Y
 - Dropping test database...
Success.

 - Removing privileges on test database...
Success.

Reloading the privilege tables will ensure that all changes
made so far will take effect immediately.

Reload privilege tables now? (Press y|Y for Yes, any other key for No) : Y
Success.

All done!
위와 같이 해주시면 root 비밀번호를 간단히 적용하실 수 있습니다. 특히
VALIDATE PASSWORD COMPONENT can be used to test passwords and improve security. It checks the strength of password and allows the users to set only those passwords which are secure enough. Would you like to setup VALIDATE PASSWORD component?
(VALIDATE PASSWORD COMPONENT를 사용하여 비밀번호를 테스트하고 보안을 향상시킬 수 있습니다. 이 체크는 암호의 강도와 충분히 안전한 암호를 설정하여 사용자에게 허용합니다. VALIDATE PASSWORD 구성 요소를 설정 하시겠습니까?)
이 부분에서 "No" 나 "N" 을 눌러주세요. 그렇지 않으시면 아주 긴 비밀번호를 입력해야 할 수도 있습니다.
저의 경우에는 20자 짜리 길이의 비밀번호를 입력했는데요 예상강도가 50이라고 하면서 더 복잡한 암호를 요구하였습니다.
$ brew services stop mysql
Stopping `mysql`... (might take a while)
==> Successfully stopped `mysql` (label: homebrew.mxcl.mysql)
$
$ ll /usr/local/var/mysql
total 221584
drwxr-xr-x  7 jaehonghan  admin       224  3 25 21:10 .
drwxrwxr-x  4 jaehonghan  admin       128  3 25 21:04 ..
-rw-r-----  1 jaehonghan  admin  12582912  3 25 21:10 ibdata1
-rw-r-----  1 jaehonghan  admin  50331648  3 25 21:04 ib_logfile1
-rw-r-----  1 jaehonghan  admin       217  3 25 21:10 ib_buffer_pool
-rw-r-----  1 jaehonghan  admin  50331648  3 25 21:10 ib_logfile0
-rw-r-----  1 jaehonghan  admin    152279  3 25 21:10 jaeui-MacBookPro.local.err
$ rm -rf /usr/local/var/mysql

$ ll /usr/local/var/mysql

$ brew uninstall mysql

Uninstalling /usr/local/Cellar/mysql... (319 files, 232.3MB)


$ brew services list
Name    Status  User Plist
emacs   stopped
unbound stopped

$ brew install mysql
==> Downloading https://homebrew.bintray.com/bottles/mysql-8.0.19.catalina.bottle.2.tar.gz
Already downloaded: /Users/jaehonghan/Library/Caches/Homebrew/downloads/16119cce36310b0d4f34d54a3a0dd701d068e946c1d4bd4c7bb409b9f9899760--mysql-8.0.19.catalina.bottle.2.tar.gz
==> Pouring mysql-8.0.19.catalina.bottle.2.tar.gz
==> /usr/local/Cellar/mysql/8.0.19/bin/mysqld --initialize-insecure --user=jaehonghan --basedir=/usr/local/Cellar/mysql/8.0.19 --datad
==> Caveats
We've installed your MySQL database without a root password. To secure it run:
    mysql_secure_installation

MySQL is configured to only allow connections from localhost by default

To connect run:
    mysql -uroot

To have launchd start mysql now and restart at login:
  brew services start mysql
Or, if you don't want/need a background service you can just run:
  mysql.server start
==> Summary
🍺  /usr/local/Cellar/mysql/8.0.19: 286 files, 289.2MB

$ brew services list
Name    Status  User Plist
emacs   stopped
mysql   stopped
unbound stopped
java.vm.specification.vendor=Sun Microsystems Inc. user.variant= os.name=Windows XP sun.jnu.encoding=MS949 java.library.path=C:\Program Files\Java\jdk1.5.0_18\bin;
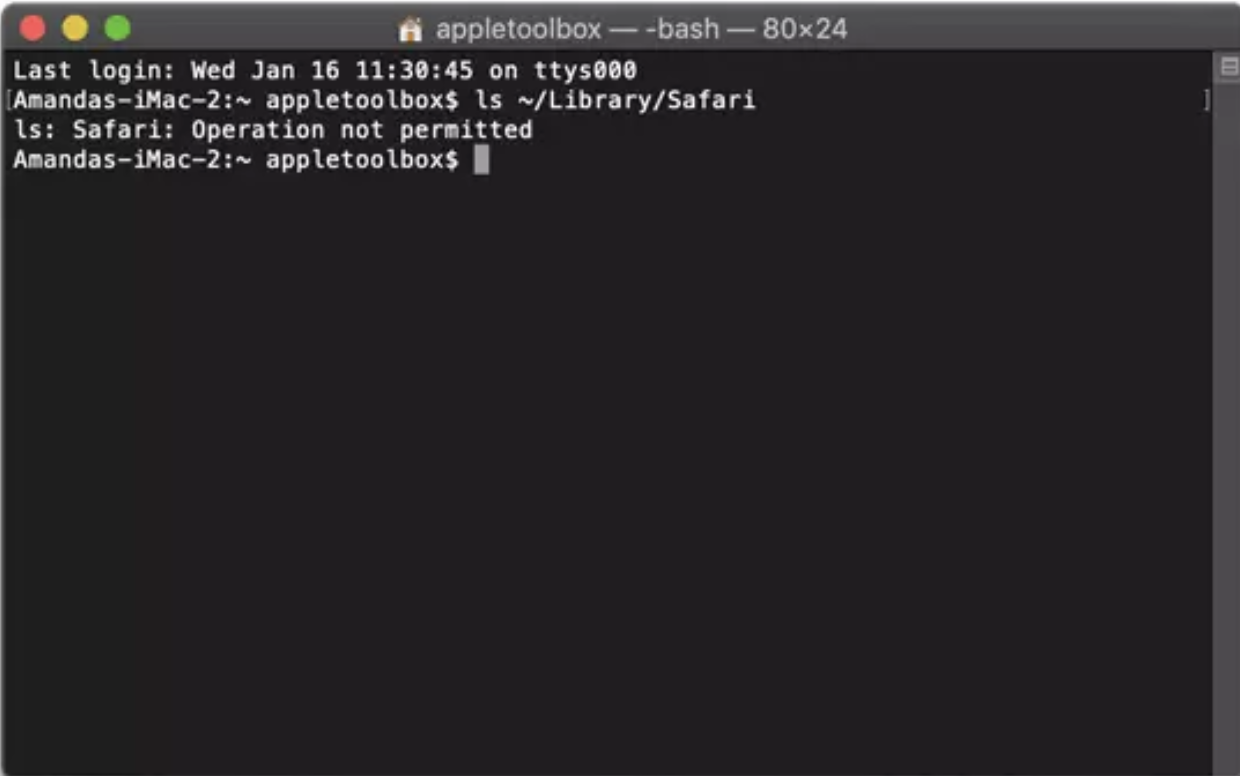
MacOS 에서 시스템 폴더에 접근하여 파일을 생성하거나 디렉토리를 만들려고 하니 "Operation not permitted" 라는 메세지가 뜨면서 실행이 안됩니다.
MacOS 에서 시스템 폴더에 접근하여 파일을 생성하거나 디렉토리를 만들려고 하면 "Operation not permitted" 라는 메세지가 뜨면서 실행이 안됩니다.
저의 경우에는 Apache 웹서버에 특정 파일을 가져다 놓을려고 했는데 위와 같은 에러가 발생하면서 생성이 되지 않았습니다.
이럴 경우에는 SIP (Security Integrity Protection)라고 하는 시스템 무결성 보호(SIP)를 꺼주어야 합니다.
시스템 무결성 보호(SIP)란 macOS 시스템 폴더 내에 시스템을 구동하는데 큰 영향을 끼치는 파일들을 보호하기 위해 존재하며, 해당 파일들은 admin 계정으로 접속을 하더라도 수정, 실행, 삭제 등의 제약을 받습니다.
즉, 시스템 파일과 폴더를 수정할 가능성을 사전에 차단해 악성 소프트웨어로부터 Mac을 보호해주는 기능입니다. 매우 효과적인 보안기능이지만 사용자가 시스템을 수정하거나 일부 소프트웨어를 사용해야 할 경우에 SIP를 해제해야 합니다.
따라서, 평소에는 SIP 기능이 활성화된 상태로 맥을 사용하며, 필요에 따라 잠깐씩 해제하는 것이 보안 관점에서 바람직합니다
SIP에 영향으로 내 마음대로 수정/삭제가 불가능한 디렉토리
/System /sbin /bin /usr : /usr/local 디렉토리를 제외한 나머지 서브디렉토리 /Applications : macOS에 기본적으로 설치된 앱(캘린더, 사진, 사파리, 터미널 등
SIP기능 비활성하기
1. Mac 재부팅하여 command + R 키를 계속 눌러 Recovery Mode 로 진입합니다. 2. Recovery Mode 에서 Utilities 메뉴에서 Terminal 을 클릭합니다. 3. Terminal 화면에서 "csrutil disable"을 입력합니다. 4. "reboot"을 입력하여 재부팅합니다.
그래서 부팅이 되면 터미널에서 다음 커맨드를 입력하여 / 에 대해서도 쓰기가 가능하도록 조치해야 합니다.
$ sudo mount -uw /
이제 / 디렉토리가 쓰기가능하게 바뀌면서 파일을 만들거나 디렉토리를 만들어 줄 수 있게 됩니다.
macOS의 시스템 폴더에 대한 권한을 획득하여 작업을 하신 후에 다시 활성화하는게 좋습니다.
SIP기능 활성화하기 - macOS Sierra 10.12.2 이전 버전 1. Mac 재부팅하여 command + R 키를 계속 눌러 Recovery Mode 로 진입합니다. 2. Recovery Mode 에서 Utilities 메뉴에서 Terminal 을 클릭합니다. 3. Terminal 화면에서 "csrutil enable"을 입력합니다. 4. "reboot"을 입력하여 재부팅합니다.
$ csrutil enable

...

$ reboot
SIP기능 활성화하기 - macOS Sierra 10.12.2 이후 버전
macOS Sierra 10.12.2 이후 버전에서 복구모드로 접근할 필요 없이, 터미널에서 아래 커맨드만 치시면 됩니다.
$ sudo csrutil clear

또는

$ sudo /usr/bin/csrutil clear