728x90

Homebrew 설치하기

macOS에는 macOS 용 패키지 관리자 Homebrew가 있습니다.

Homebrew를 이용하면 설정 과정이 단순하고, 환경변수 설정이 필요없고, 관리하기 편리하기 때문입니다.


터미널에 아래의 명령어 입력하여 Homebrew 를 설치합니다.

/usr/bin/ruby -e "$(curl -fsSL https://raw.githubusercontent.com/Homebrew/install/master/install)"


"Press RETURN to continue or any other key to abort" 라는 문장이 뜨면, 엔터키(리턴키)를 눌러준다.

password에는 mac의 비밀번호를 입력해 주면 됩니다.

비밀번호를 입력하지 않으면 비밀번호 없이 설치가 됩니다.


아래의 명령어로 cask 패키지(Safari, Chrome, Word 등과 같이 그래픽을 통해 작업하는 프로그램을 설치할 수 있게 해주는 패키지)를 설치해 줍니다.

brew install cask
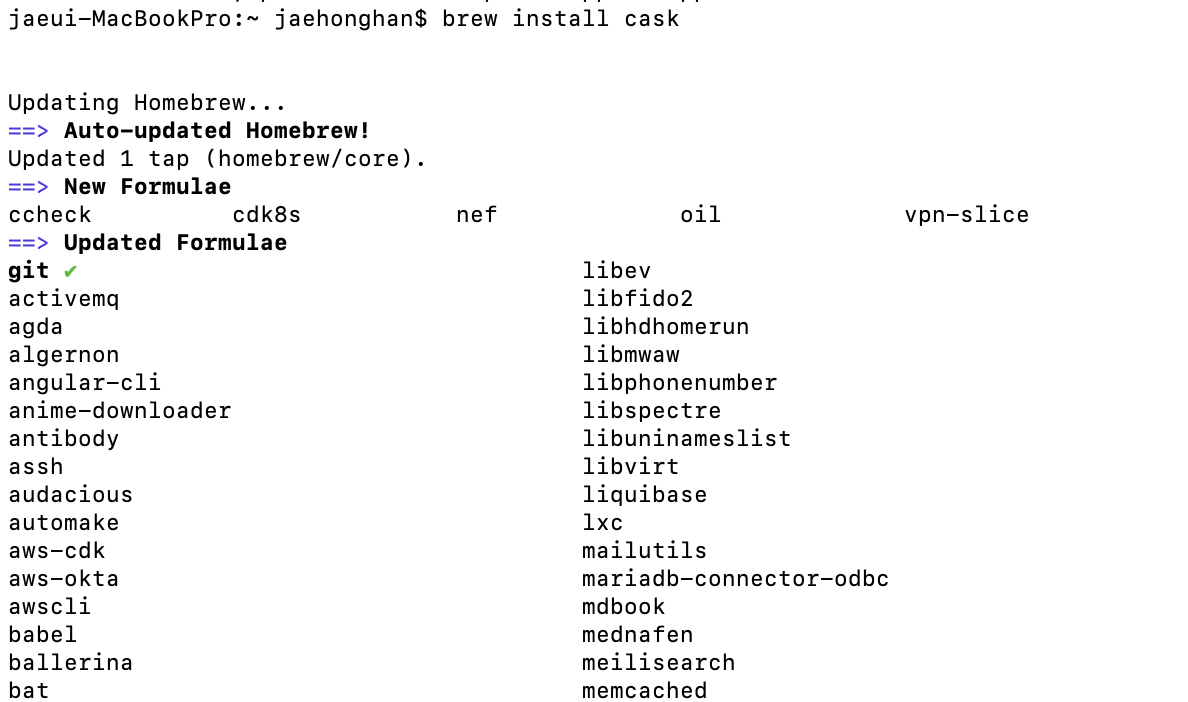
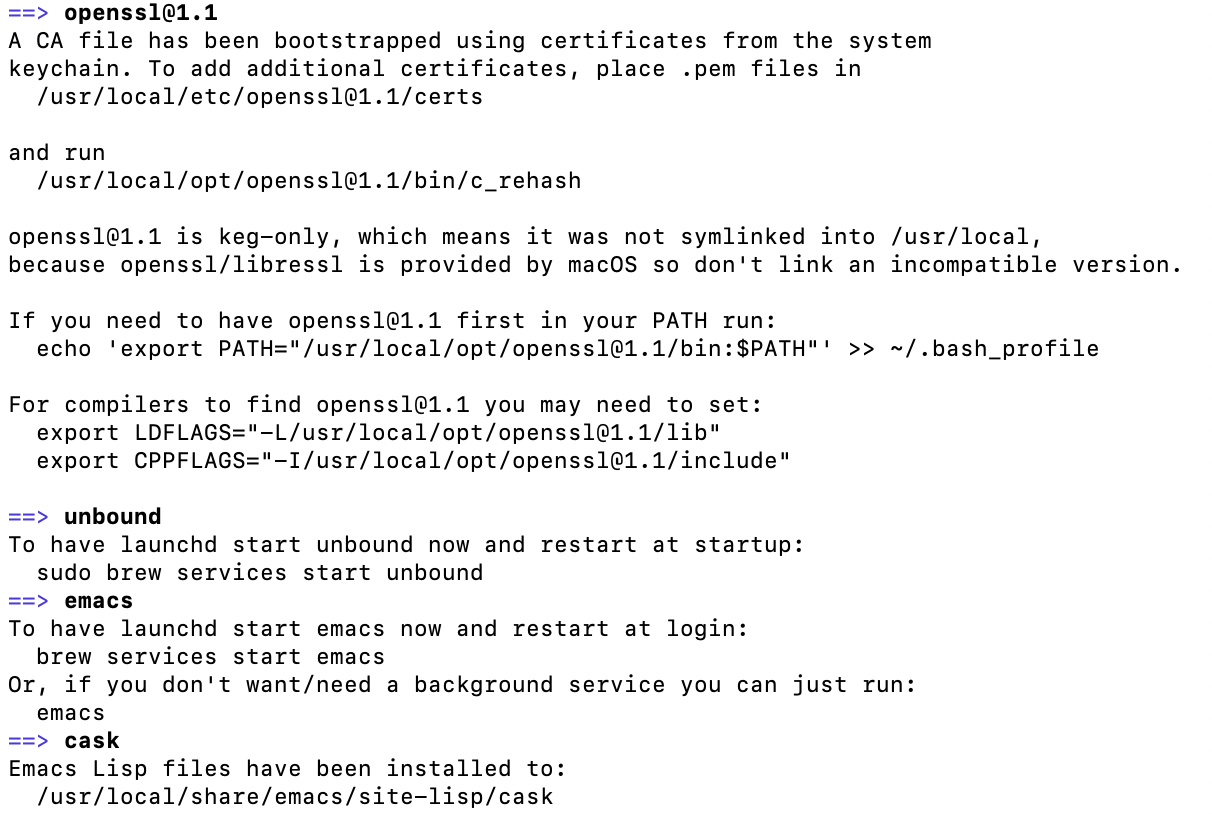


Homebrew를 통해 프로그램을 설치하기 전엔 항상 아래의 명령어로 업데이트가 있는지 확인 후 진행합니다.

brew update


MySQL 설치

1. brew update를 통해 최신 버전으로 업데이트를 해줍니다.

2. brew search mysql을 통해 설치할 MySQL 버전을 확인해 줍니다.

3. brew install mysql을 통해 원하는 버전의 MySQL을 설치해 줍니다. (이 경우 최신버전)

// 최신 버전으로 업데이트를 해줍니다.
brew update

// 설치할 MySQL 버전을 확인해 줍니다.
brew search mysql

// 원하는 버전의 MySQL을 설치해 줍니다. (이 경우 최신버전)
brew install mysql


mysql 설치할 버전을 찾아줍니다.


$ brew search mysql

mysql 서버를 설치합니다.

$ brew install mysql


Homebrew  서비스 확인 :: brew services list / 설치 디렉토리 확인 / brew 서비스 시작

실행 중인 홈브루 서비스를 확인합니다.

$ brew services list


mysql 서버가 제대로 설치된 것을 확인할 수 있고, 서비스가 중지되어 있는 것을 확인할 수 있습니다.

jaeui-MacBookPro:~ jaehonghan$ brew services list
==> Tapping homebrew/services
Cloning into '/usr/local/Homebrew/Library/Taps/homebrew/homebrew-services'...
remote: Enumerating objects: 691, done.
remote: Total 691 (delta 0), reused 0 (delta 0), pack-reused 691
Receiving objects: 100% (691/691), 187.09 KiB | 728.00 KiB/s, done.
Resolving deltas: 100% (272/272), done.
Tapped 1 command (40 files, 260.7KB).
Name    Status  User Plist
emacs   stopped      
mysql   stopped      
unbound stopped   


설치된 MySQL 데이터 디렉터리를 확인합니다.

$ ls -al /usr/local/var/mysql

jaeui-MacBookPro:~ jaehonghan$ ls -al /usr/local/var/mysql
total 317552
drwxr-x---    2 jaehonghan  admin        64  3 25 21:03 #innodb_temp
drwxr-xr-x   26 jaehonghan  admin       832  3 25 21:03 .
drwxrwxr-x    4 jaehonghan  admin       128  3 25 20:54 ..
-rw-r-----    1 jaehonghan  admin        56  3 25 20:54 auto.cnf
-rw-r-----    1 jaehonghan  admin       178  3 25 21:01 binlog.000001
-rw-r-----    1 jaehonghan  admin       178  3 25 21:03 binlog.000002
-rw-r-----    1 jaehonghan  admin        32  3 25 21:01 binlog.index
-rw-------    1 jaehonghan  admin      1676  3 25 20:54 ca-key.pem
-rw-r--r--    1 jaehonghan  admin      1112  3 25 20:54 ca.pem
-rw-r--r--    1 jaehonghan  admin      1112  3 25 20:54 client-cert.pem
-rw-------    1 jaehonghan  admin      1676  3 25 20:54 client-key.pem
-rw-r-----    1 jaehonghan  admin      3345  3 25 21:03 ib_buffer_pool
-rw-r-----    1 jaehonghan  admin  50331648  3 25 21:03 ib_logfile0
-rw-r-----    1 jaehonghan  admin  50331648  3 25 20:54 ib_logfile1
-rw-r-----    1 jaehonghan  admin  12582912  3 25 21:03 ibdata1
-rw-r-----    1 jaehonghan  admin      2422  3 25 21:03 jaeui-MacBookPro.local.err
drwxr-x---    8 jaehonghan  admin       256  3 25 20:54 mysql
-rw-r-----    1 jaehonghan  admin  28311552  3 25 21:01 mysql.ibd
drwxr-x---  105 jaehonghan  admin      3360  3 25 20:54 performance_schema
-rw-------    1 jaehonghan  admin      1680  3 25 20:54 private_key.pem
-rw-r--r--    1 jaehonghan  admin       452  3 25 20:54 public_key.pem
-rw-r--r--    1 jaehonghan  admin      1112  3 25 20:54 server-cert.pem
-rw-------    1 jaehonghan  admin      1676  3 25 20:54 server-key.pem
drwxr-x---    3 jaehonghan  admin        96  3 25 20:54 sys
-rw-r-----    1 jaehonghan  admin  10485760  3 25 21:03 undo_001
-rw-r-----    1 jaehonghan  admin  10485760  3 25 21:01 undo_002


Homebrew MySQL 서비스 시작합니다.

$ brew services start mysql

jaeui-MacBookPro:~ jaehonghan$ brew services start mysql
==> Successfully started `mysql` (label: homebrew.mxcl.mysql)
jaeui-MacBookPro:~ jaehonghan$ brew services list
Name    Status  User       Plist
emacs   stopped            
mysql   started jaehonghan /Users/jaehonghan/Library/LaunchAgents/homebrew.mxcl.mysql.plist
unbound stopped            


MySQL 실행 및 ROOT 비밀번호 설정


내 환경설정 파일에 PATH를 설정해 주세요. mysql 부분을 설정하시고 저장하세요.


$ vi ~/.bash_profile

$ vi ~/.bash_profile


# mysql 설정부분
export PATH="/usr/local/opt/mysql/bin:$PATH"
export LDFLAGS="-L/usr/local/opt/mysql/lib"
export CPPFLAGS="-I/usr/local/opt/mysql/include"


:wq


설정된 내용을 적용시켜 줍니다.

$ source ~/.bash_profile


mysql 서버를 실행합니다.

mysql.server start


시작해서 SUCCESS! 메세지가 뜨면 mysql서버에 접속해 봅니다. (비밀번호 없이 접속이 가능합니다.)

$ mysql -uroot

jaeui-MacBookPro:~ jaehonghan$ mysql.server start
Starting MySQL
 SUCCESS! 

// Ctrl+ C 를 눌러주세요. 백그라운드로 실행되니 안심하세요.

jaeui-MacBookPro:~ jaehonghan$ mysql -uroot
Welcome to the MySQL monitor.  Commands end with ; or \g.
Your MySQL connection id is 8
Server version: 8.0.19 Homebrew

Copyright (c) 2000, 2020, Oracle and/or its affiliates. All rights reserved.

Oracle is a registered trademark of Oracle Corporation and/or its
affiliates. Other names may be trademarks of their respective
owners.

Type 'help;' or '\h' for help. Type '\c' to clear the current input statement.

mysql> exit


MySQL ROOT  비밀번호 설정

1. mysql.server start 명령어로 MySQL 서버를 실행시킵니다.

2. mysql_secure_installation 명령어로 MySQL ROOT비밀번호를 설정합니다.


  1. Would you like to setup VALIDATE PASSWORD component?(비밀번호 가이드 설정에 대한 질문)
    yes: 복잡한 비밀번호
    no: 쉬운 비밀번호 --> 쉬운 비밀번호로 세팅해주세요.

  2. Remove anonymous users? (Press y|Y for Yes. any other key for No)(사용자 설정에 관한 질문)
    yes: 접속시 -u 옵션필요
    no: 접속시 -u 옵션 불필요

  3. Disallow root login remotely? (Press y|Y for Yes, any other key for No)(다른 IP에서 root 아이디로 원격접속을 설정)
    yes: 원격접속 불가능
    no: 원격접속 가능

  4. Remove test database and access to it? (Press y|Y for Yes, any other key for No)(테스트 데이터베이스 설정)
    yes: 테스트 데이터베이스 제거
    no: 테스트 데이터베이스 유지

  5. Reload privilege tables now? (Press y|Y for Yes, any other key for No)(변경된 권한을 테이블에 적용)
    yes: 적용
    no: 미적용

$ mysql_secure_installation

Securing the MySQL server deployment.

Connecting to MySQL using a blank password.

VALIDATE PASSWORD COMPONENT can be used to test passwords
and improve security. It checks the strength of password
and allows the users to set only those passwords which are
secure enough. Would you like to setup VALIDATE PASSWORD component?

Press y|Y for Yes, any other key for No: N
Please set the password for root here.

New password: 

Re-enter new password: 
By default, a MySQL installation has an anonymous user,
allowing anyone to log into MySQL without having to have
a user account created for them. This is intended only for
testing, and to make the installation go a bit smoother.
You should remove them before moving into a production
environment.

Remove anonymous users? (Press y|Y for Yes, any other key for No) : Y
Success.


Normally, root should only be allowed to connect from
'localhost'. This ensures that someone cannot guess at
the root password from the network.

Disallow root login remotely? (Press y|Y for Yes, any other key for No) : Y
Success.

By default, MySQL comes with a database named 'test' that
anyone can access. This is also intended only for testing,
and should be removed before moving into a production
environment.


Remove test database and access to it? (Press y|Y for Yes, any other key for No) : Y
 - Dropping test database...
Success.

 - Removing privileges on test database...
Success.

Reloading the privilege tables will ensure that all changes
made so far will take effect immediately.

Reload privilege tables now? (Press y|Y for Yes, any other key for No) : Y
Success.

All done! 

위와 같이 해주시면 root 비밀번호를 간단히 적용하실 수 있습니다.
특히 

VALIDATE PASSWORD COMPONENT can be used to test passwords and improve security. It checks the strength of password
and allows the users to set only those passwords which are secure enough. Would you like to setup VALIDATE PASSWORD component?


(VALIDATE PASSWORD COMPONENT를 사용하여 비밀번호를 테스트하고 보안을 향상시킬 수 있습니다. 이 체크는 암호의 강도와 충분히 안전한 암호를 설정하여 사용자에게 허용합니다. VALIDATE PASSWORD 구성 요소를 설정 하시겠습니까?)

이 부분에서 "No" 나 "N" 을 눌러주세요.
그렇지 않으시면 아주 긴 비밀번호를 입력해야 할 수도 있습니다.

저의 경우에는 20자 짜리 길이의 비밀번호를 입력했는데요 예상강도가 50이라고 하면서 더 복잡한 암호를 요구하였습니다.

Estimated strength of the password: 50 


이런 경우에는 mysql을 재설치하였습니다.

재설치 방법은 아래에 정리해 뒀습니다.


mysql 서버 접속해봅니다.

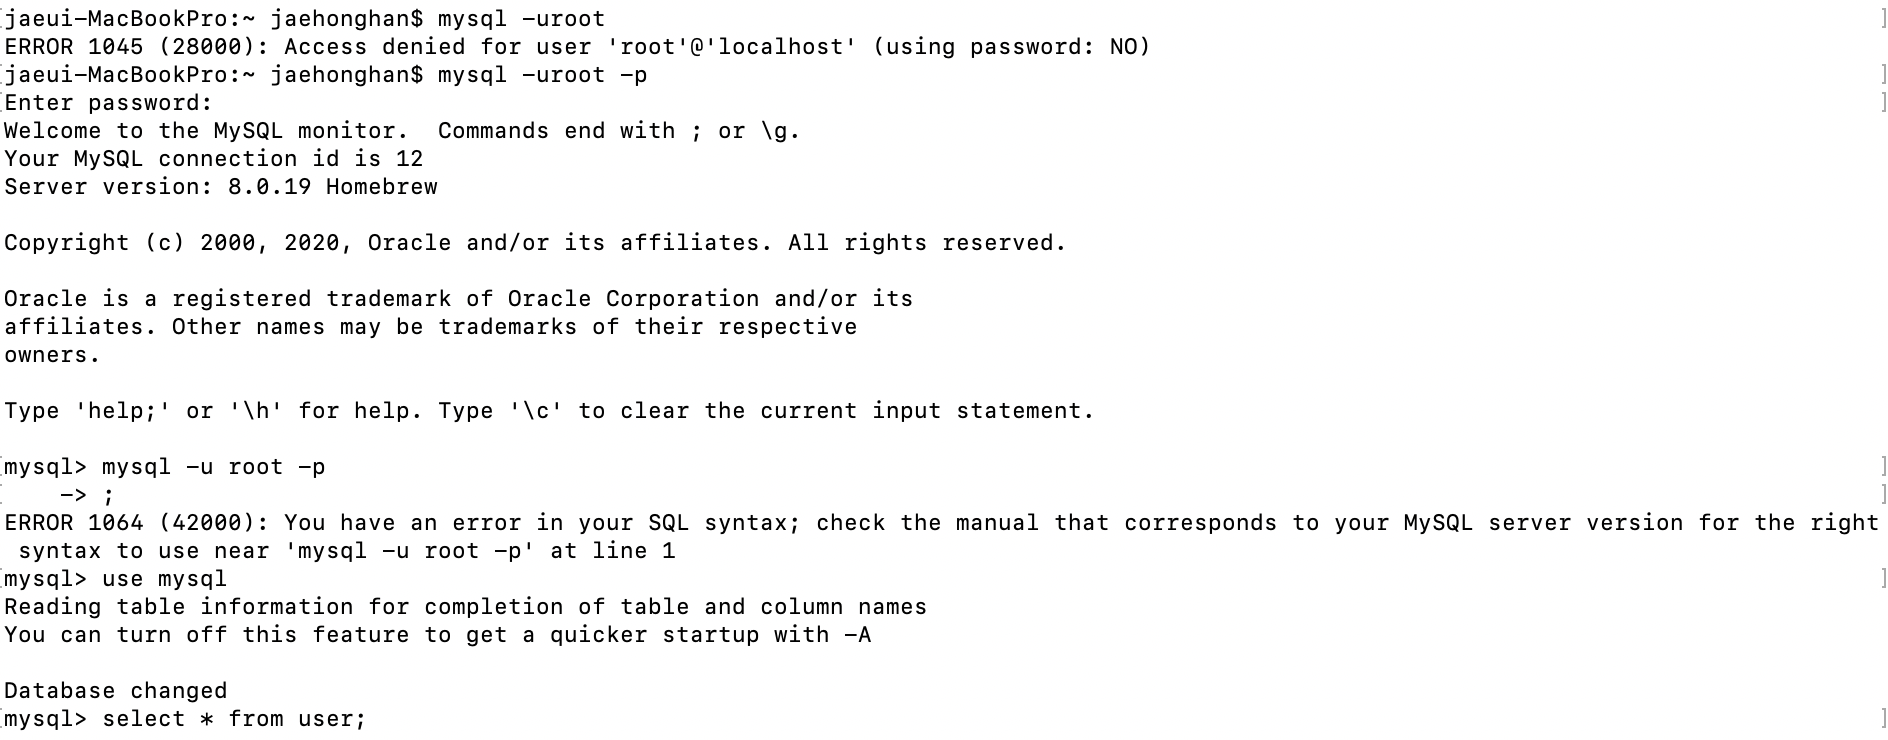
$ mysql -uroot 로 하면 에러가 발생합니다.

$ mysql -uroot -p로 해서 설정된 비밀번호를 입력합니다.
 

mysql  로그아웃을 해보세요

mysql >exit 또는 mysql> quit


mysql 서버를 종료 해보세요.

$ mysql.server stop


MySQL 삭제 및 재설치 하기


brew  서비스에서 mysql 서비스를 중지시킵니다.

$ brew services stop mysql


mysql 설치 디렉토리를 삭제합니다.

$ ll /usr/local/var/mysql
$ rm -rf /usr/local/var/mysql

sudo rm -rf /usr/local/var/mysql
sudo rm -rf /usr/local/bin/mysql*
sudo rm -rf /usr/local/Cellar/mysql


brew 에서 mysql을 언인스톨시킵니다.

$ brew uninstall mysql


brew 에서 서비스가 삭제되었는지 확인해 봅니다.
$ brew services list


brew 에서 mysql을 인스톨합니다.
$ brew install mysql


brew 에서 서비스가 설치되었는지 확인해 봅니다.
$ brew services list


$ brew services stop mysql
Stopping `mysql`... (might take a while)
==> Successfully stopped `mysql` (label: homebrew.mxcl.mysql)
$ 
$ ll /usr/local/var/mysql
total 221584
drwxr-xr-x  7 jaehonghan  admin       224  3 25 21:10 .
drwxrwxr-x  4 jaehonghan  admin       128  3 25 21:04 ..
-rw-r-----  1 jaehonghan  admin  12582912  3 25 21:10 ibdata1
-rw-r-----  1 jaehonghan  admin  50331648  3 25 21:04 ib_logfile1
-rw-r-----  1 jaehonghan  admin       217  3 25 21:10 ib_buffer_pool
-rw-r-----  1 jaehonghan  admin  50331648  3 25 21:10 ib_logfile0
-rw-r-----  1 jaehonghan  admin    152279  3 25 21:10 jaeui-MacBookPro.local.err
$ rm -rf /usr/local/var/mysql

$ ll /usr/local/var/mysql

$ brew uninstall mysql

Uninstalling /usr/local/Cellar/mysql... (319 files, 232.3MB)


$ brew services list
Name    Status  User Plist
emacs   stopped      
unbound stopped 

$ brew install mysql
==> Downloading https://homebrew.bintray.com/bottles/mysql-8.0.19.catalina.bottle.2.tar.gz
Already downloaded: /Users/jaehonghan/Library/Caches/Homebrew/downloads/16119cce36310b0d4f34d54a3a0dd701d068e946c1d4bd4c7bb409b9f9899760--mysql-8.0.19.catalina.bottle.2.tar.gz
==> Pouring mysql-8.0.19.catalina.bottle.2.tar.gz
==> /usr/local/Cellar/mysql/8.0.19/bin/mysqld --initialize-insecure --user=jaehonghan --basedir=/usr/local/Cellar/mysql/8.0.19 --datad
==> Caveats
We've installed your MySQL database without a root password. To secure it run:
    mysql_secure_installation

MySQL is configured to only allow connections from localhost by default

To connect run:
    mysql -uroot

To have launchd start mysql now and restart at login:
  brew services start mysql
Or, if you don't want/need a background service you can just run:
  mysql.server start
==> Summary
🍺  /usr/local/Cellar/mysql/8.0.19: 286 files, 289.2MB

$ brew services list
Name    Status  User Plist
emacs   stopped      
mysql   stopped      
unbound stopped      


참고URL


mac에 MySQL 설치하기

https://velog.io/@max9106/mac%EC%97%90-MySQL-%EC%84%A4%EC%B9%98%ED%95%98%EA%B8%B0-4ck17gzjk3

OS X에서 MySQL을 잘못 설치했을 때 다시 설치하는 방법
https://github.com/appkr/l5code/issues/4

728x90

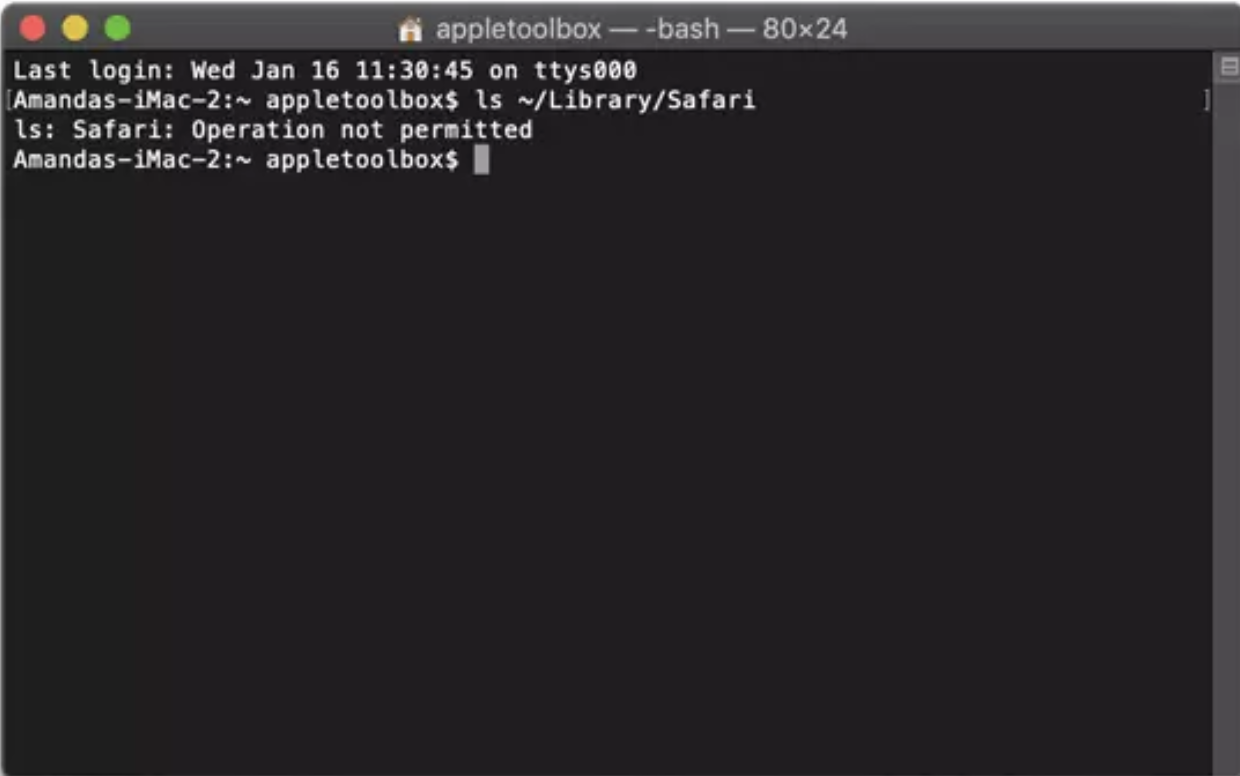
MacOS 에서 시스템 폴더에 접근하여 파일을 생성하거나 디렉토리를 만들려고 하니 "Operation not permitted" 라는 메세지가 뜨면서 실행이 안됩니다.


MacOS 에서 시스템 폴더에 접근하여 파일을 생성하거나 디렉토리를 만들려고 하면  "Operation not permitted" 라는 메세지가 뜨면서 실행이 안됩니다.

저의 경우에는 Apache 웹서버에 특정 파일을 가져다 놓을려고 했는데 위와 같은 에러가 발생하면서 생성이 되지 않았습니다.

이럴 경우에는 SIP (Security Integrity Protection)라고 하는 시스템 무결성 보호(SIP)를 꺼주어야 합니다.


시스템 무결성 보호(SIP)란 macOS 시스템 폴더 내에 시스템을 구동하는데 큰 영향을 끼치는 파일들을 보호하기 위해 존재하며, 해당 파일들은 admin 계정으로 접속을 하더라도 수정, 실행, 삭제 등의 제약을 받습니다.


즉, 시스템 파일과 폴더를 수정할 가능성을 사전에 차단해 악성 소프트웨어로부터 Mac을 보호해주는 기능입니다.
매우 효과적인 보안기능이지만 사용자가 시스템을 수정하거나 일부 소프트웨어를 사용해야 할 경우에 SIP를 해제해야 합니다.

따라서, 평소에는 SIP 기능이 활성화된 상태로 맥을 사용하며, 필요에 따라 잠깐씩 해제하는 것이 보안 관점에서 바람직합니다


SIP에 영향으로 내 마음대로 수정/삭제가 불가능한 디렉토리

/System
/sbin
/bin
/usr : /usr/local 디렉토리를 제외한 나머지 서브디렉토리
/Applications : macOS에 기본적으로 설치된 앱(캘린더, 사진, 사파리, 터미널 등


SIP기능 비활성하기

1. Mac 재부팅하여 command + R 키를 계속 눌러 Recovery Mode 로 진입합니다.
2. Recovery Mode 에서 Utilities 메뉴에서 Terminal 을 클릭합니다.
3. Terminal 화면에서 "csrutil disable"을 입력합니다.
4. "reboot"을 입력하여 재부팅합니다.


Recovery Mode (복구모드)에 들어가면 보여지는 화면입니다.


$ csrtuil disable

....

$ reboot

위와 같이 하면 재부팅되면서 SIP기능 비활성화 됩니다.


그리고 나서 /usr 나 /etc 에 cp 명령을 해보면 

Read-only file system 

와 같은 에러가 발생합니다.

$ sudo cp libphp5.so /usr/libexec/apache2/
Password:
cp: /usr/libexec/apache2/libphp5.so: Read-only file system


그래서 부팅이 되면 터미널에서 다음 커맨드를 입력하여 / 에 대해서도 쓰기가 가능하도록 조치해야 합니다.

$ sudo mount -uw /

이제 / 디렉토리가 쓰기가능하게 바뀌면서 파일을 만들거나 디렉토리를 만들어 줄 수 있게 됩니다.


macOS의 시스템 폴더에 대한 권한을 획득하여 작업을 하신 후에 다시 활성화하는게 좋습니다.


SIP기능 활성화하기 - macOS Sierra 10.12.2 이전 버전
1. Mac 재부팅하여 command + R 키를 계속 눌러 Recovery Mode 로 진입합니다.
2. Recovery Mode 에서 Utilities 메뉴에서 Terminal 을 클릭합니다.
3. Terminal 화면에서 "csrutil enable"을 입력합니다.
4. "reboot"을 입력하여 재부팅합니다.

$ csrutil enable

...

$ reboot


SIP기능 활성화하기 - macOS Sierra 10.12.2 이후 버전

macOS Sierra 10.12.2 이후 버전에서 복구모드로 접근할 필요 없이, 터미널에서 아래 커맨드만 치시면 됩니다.

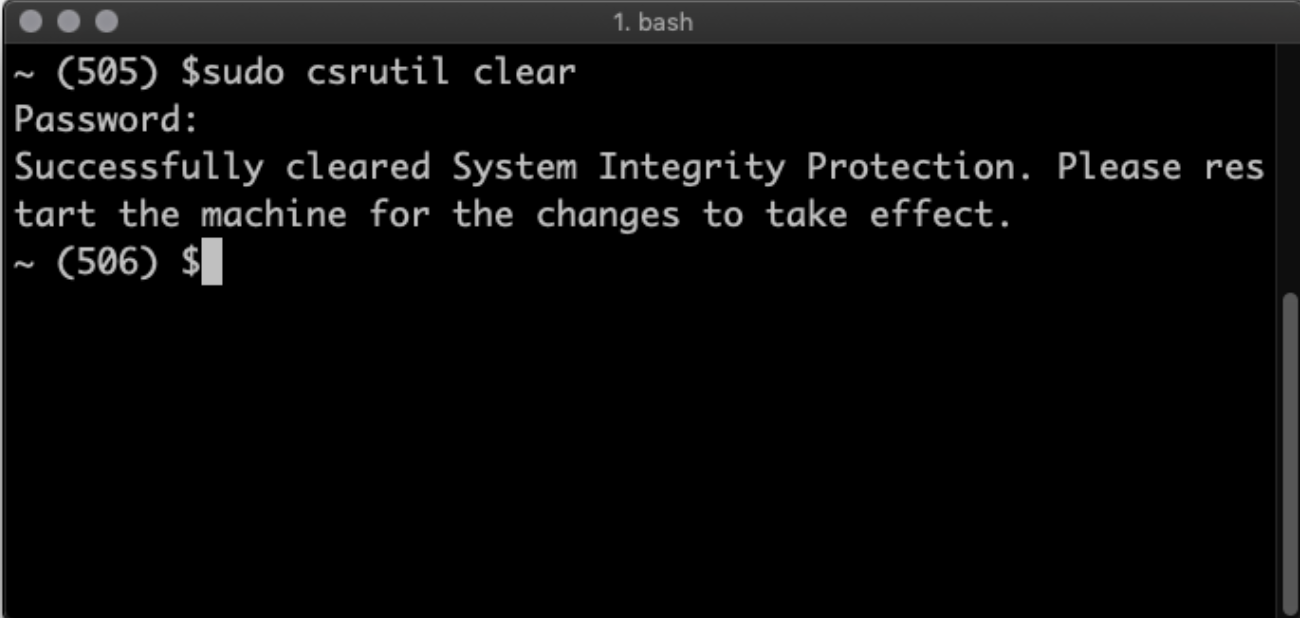
$ sudo csrutil clear

또는 

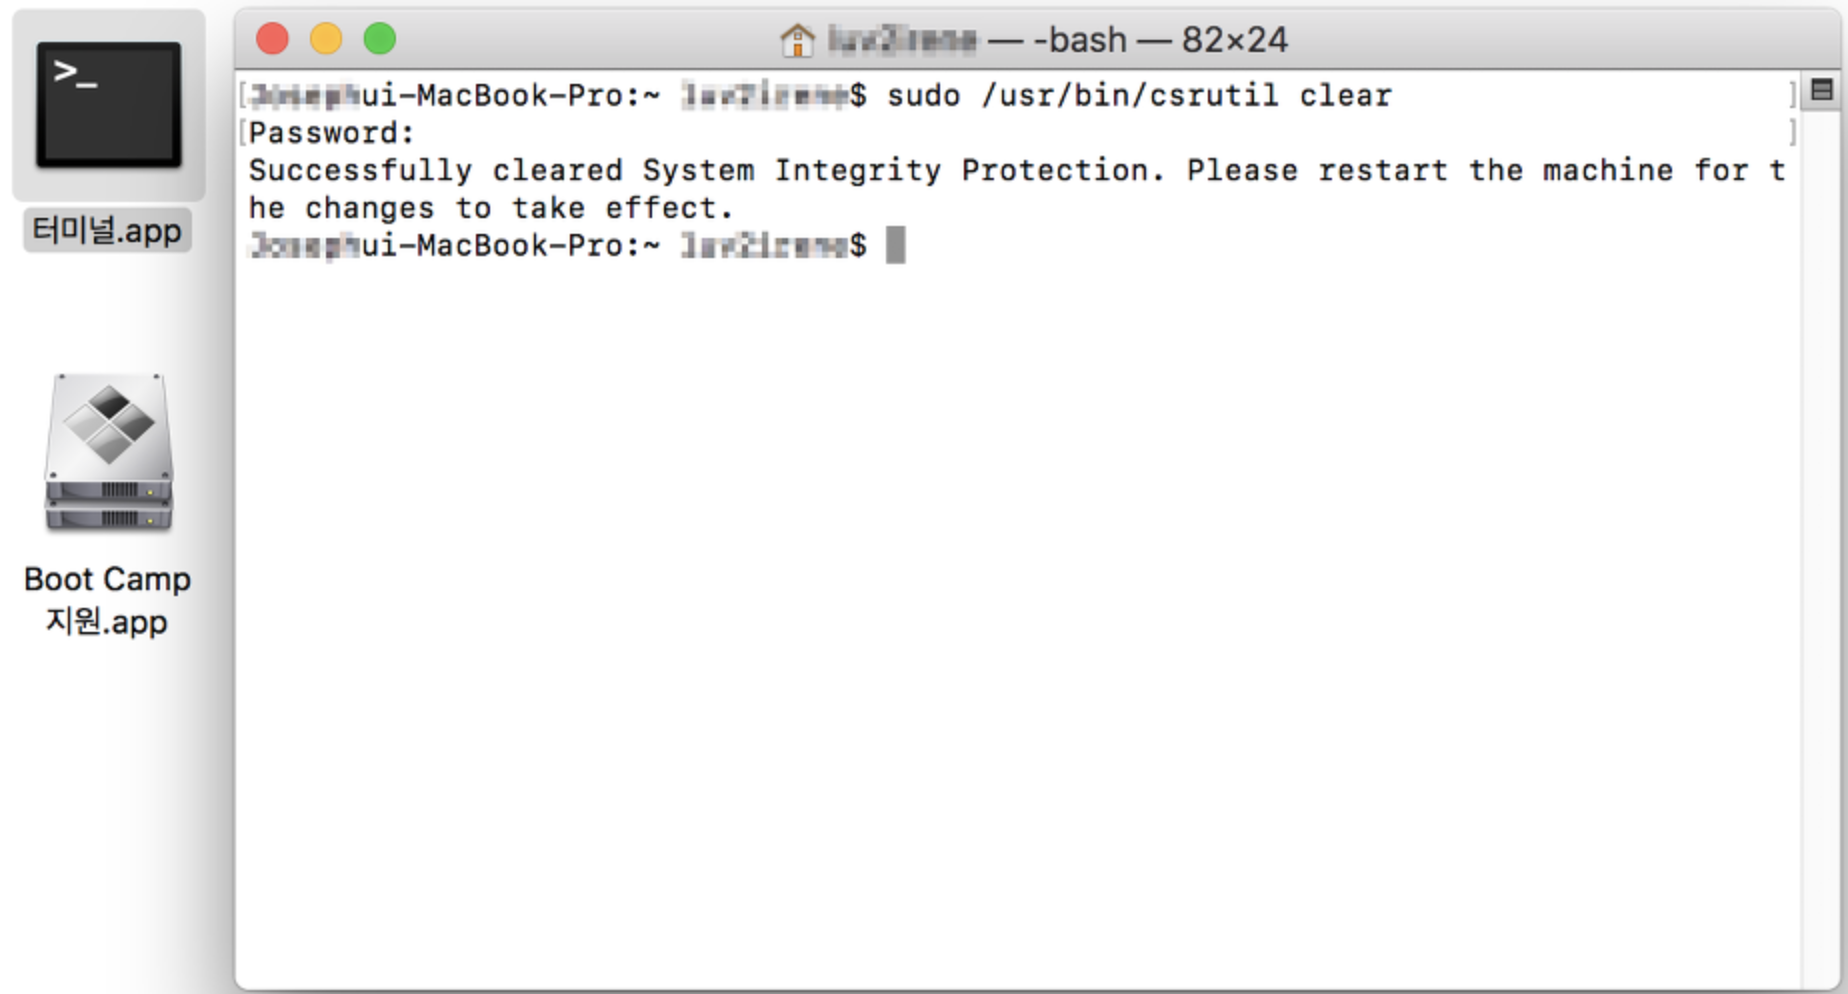
$ sudo /usr/bin/csrutil clear


< 참조URL >

Mac OS X Operation not Permitted 발생시
https://ellordnet.tistory.com/65
https://luv2irene.tistory.com/12
시스템 무결성 보호(SIP) 상태 해제 및 활성화하는 방법
https://macinjune.com/all-posts/mac/tip/%EC%8B%9C%EC%8A%A4%ED%85%9C-%EB%AC%B4%EA%B2%B0%EC%84%B1-%EB%B3%B4%ED%98%B8sip-%EC%83%81%ED%83%9C-%ED%95%B4%EC%A0%9C-%ED%99%9C%EC%84%B1%ED%99%94-%EB%B0%A9%EB%B2%95/
macOS - Catalina / (root) 에 디렉토리 만들기
https://junho85.pe.kr/1458
728x90

원문을 보고 정리하였습니다.

https://macpaw.com/how-to/remove-anysearch-malware-from-mac


How to get rid of Any Search Manager on your Mac

Any Search Manager is a piece of malware that bundles itself with downloads and redirects your browser’s homepage. Here’s how to remove it.

macpaw.com

해당 블로그에서는 아래의 클리너를 추천하고 있습니다.

하지만 무료 평가판이라고 하지만 결국 바이러스 search 하고 나서 발견되어 치료할려고 하면 업그레이드를 유도합니다.

https://macpaw.com/ko/download/cleanmymac


CleanMyMac X 평가판 무료 다운로드 — Mac을 위한 스마트한 컴퓨터 클리너

CleanMyMac X를 무려로 내려받으세요. CleanMyMac X는 Mac을 청소하고 보호하며 성능을 올려주는 필수 유틸리티입니다. 매일 사용하여 수 GB의 여유 공간을 확보하고, 악성코드를 제거하며, macOS의 건강상태를 확인하세요. 지금 MacBook이나 iMac에 내려받아 직접 확인해보세요!

macpaw.com

Combo Cleaner 도 사용해봤는데 AntiVirus를 검색하니 3건이 나오네요.

그런데 그런데 역시나 Upgrade to Premium 으로 비용내고 업그레이드 받아서 삭제하라고 뜨네요.


Variant.Application.MAC.Adload.8

Variant.Adware.Mac.AdLoad.1


해당 파일을 찾아봤는데 전혀 못찾겠어요.


아래 수동 방식으로 삭제처리하고 나서 다시 CleanMyMac을 돌렸더니 CleanMyMac 에서는 나오지 않네요.


위의 클리너를 사용하지 않고 수동으로 할 수 있는 방법이 있으니 참고하시길 바랍니다.


핵심은 Launch Agents 와 Daemons 폴더에 의심되는 프로그램을 삭제해야 합니다.

그치만 해당 폴더에 들어가면 ".plist" 파일이 안보일 수 있습니다.


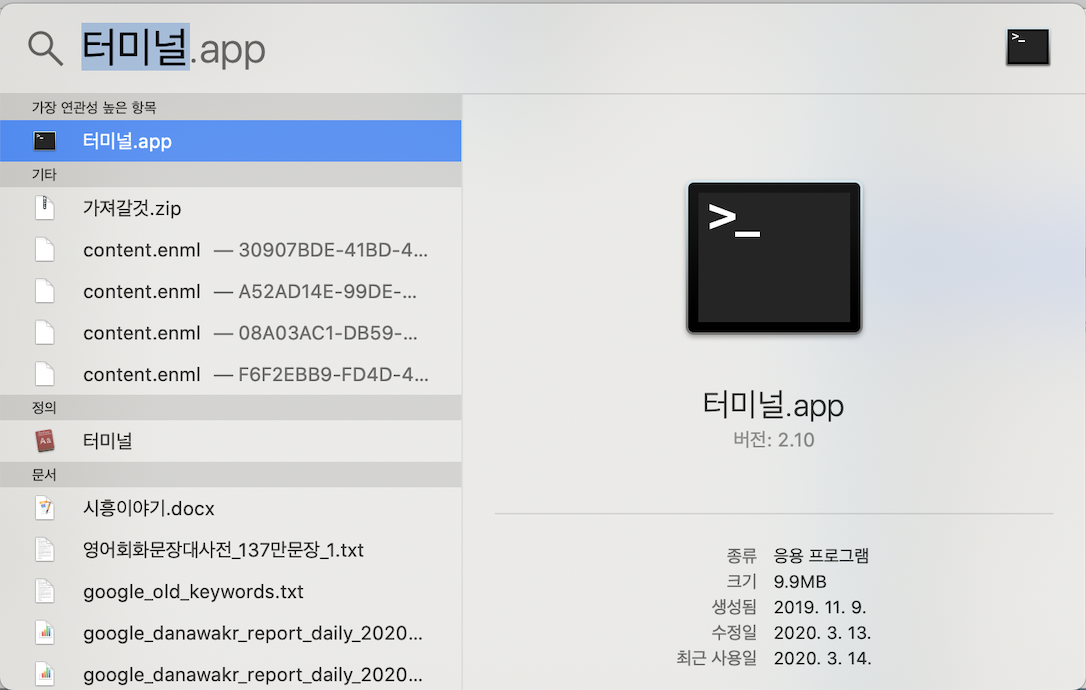
결국 terminal.app (터미널)로 들어가서 보시는게 더 좋습니다.

자 시작합니다.


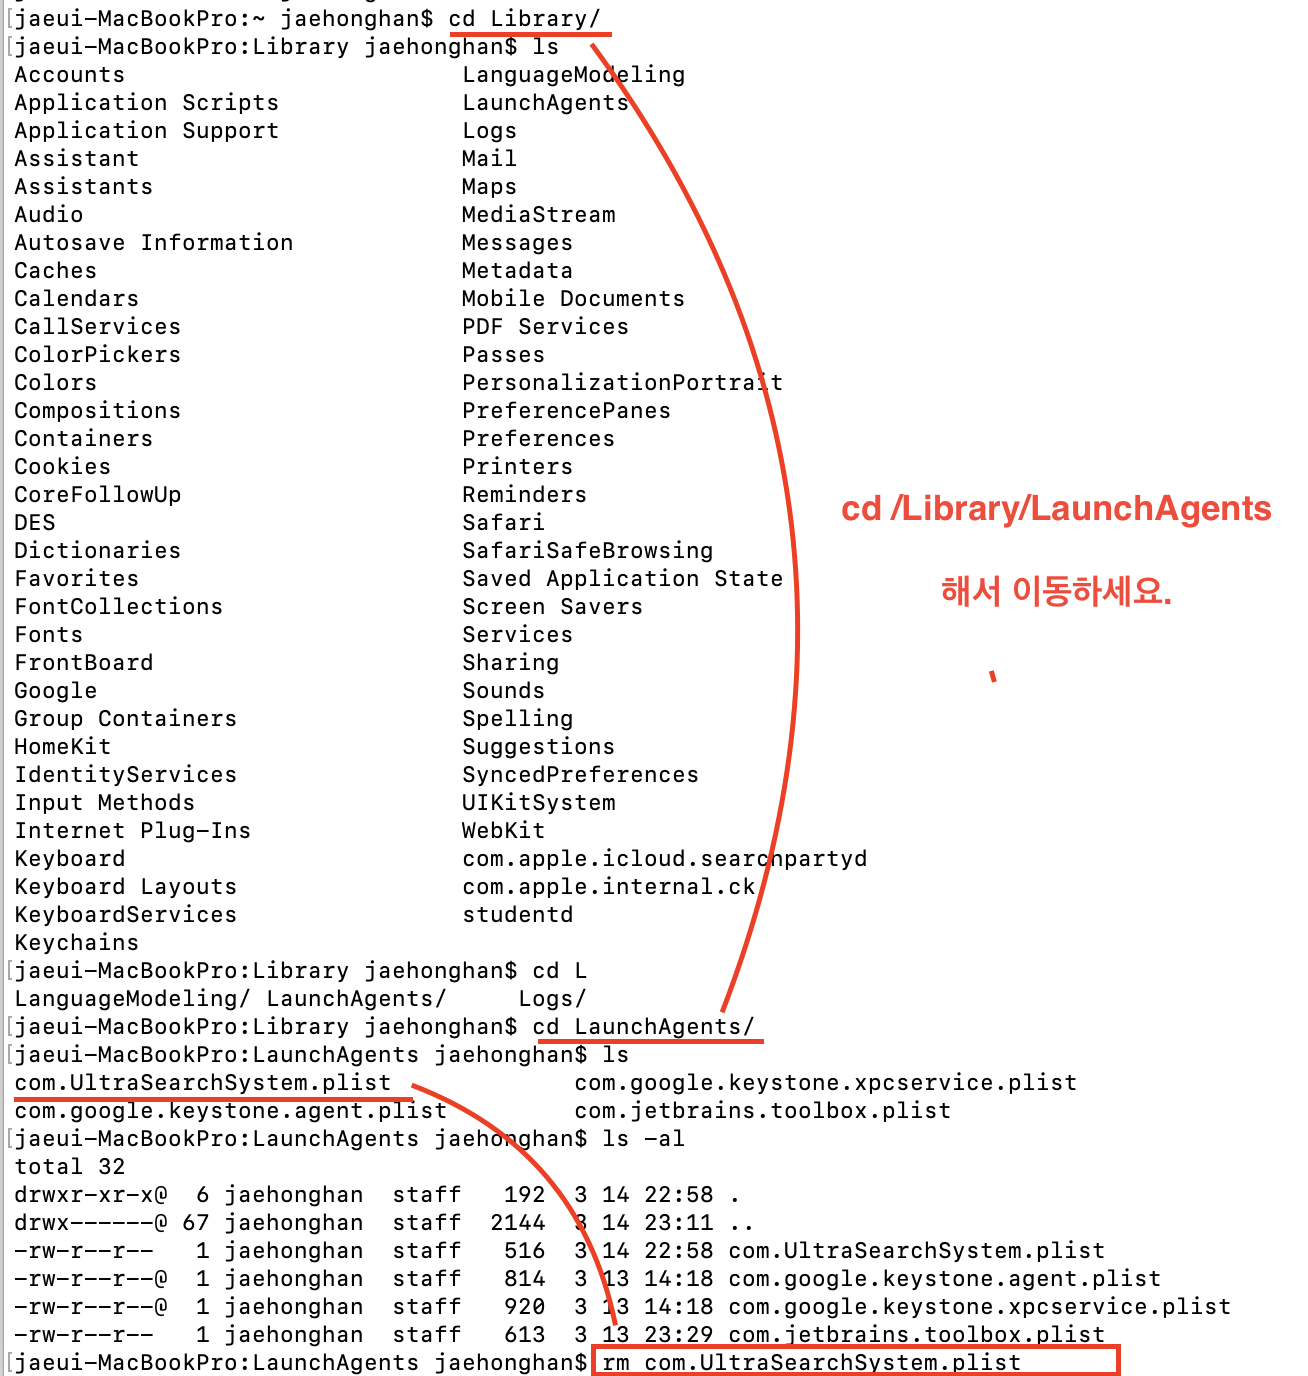
1. /Libaray/LaunchAgents 살펴보기 

저 같은 경우에는 

cd /Libaray/LaunchAgents 로 이동하여  의심되는 파일을 삭제하였습니다.


2. 사용자 의 LaunchAgents 를 살펴보기 

root 의 LaunchAgents 를 살펴보고 의심되는 plist파일을 삭제하였습니다.

그 다음  사용자 의 LaunchAgents 를 살펴봐야 합니다.


"jaehonghan" 이라는 사용자 폴더의 Libaray 에서 똑같은 LaunchAgents 폴더를 살펴 봅니다.

다행히도 여기에는 의심되는 내용이 없네요.


3. 사용자 의 ~/Library/Application\ Support/ 살펴보기 

사용자의 어플레케이션 서포트 폴더로 가서 의심되는 프로그램이 설치되어 있는지 살펴봐야 합니다.


cd ~/Library/Application\ Support/


저 같은 경우에는 UltraSearchSystem 을 발견하여 삭제하였습니다.


4. 구글 브라우저의 설정에서 검색엔진 점검하기

구글 브라우저에서 chrome://settings 로 주소검색을 합니다.

검색엔진이 다른 것으로 변경된게 아니지 확인해봐야 합니다.

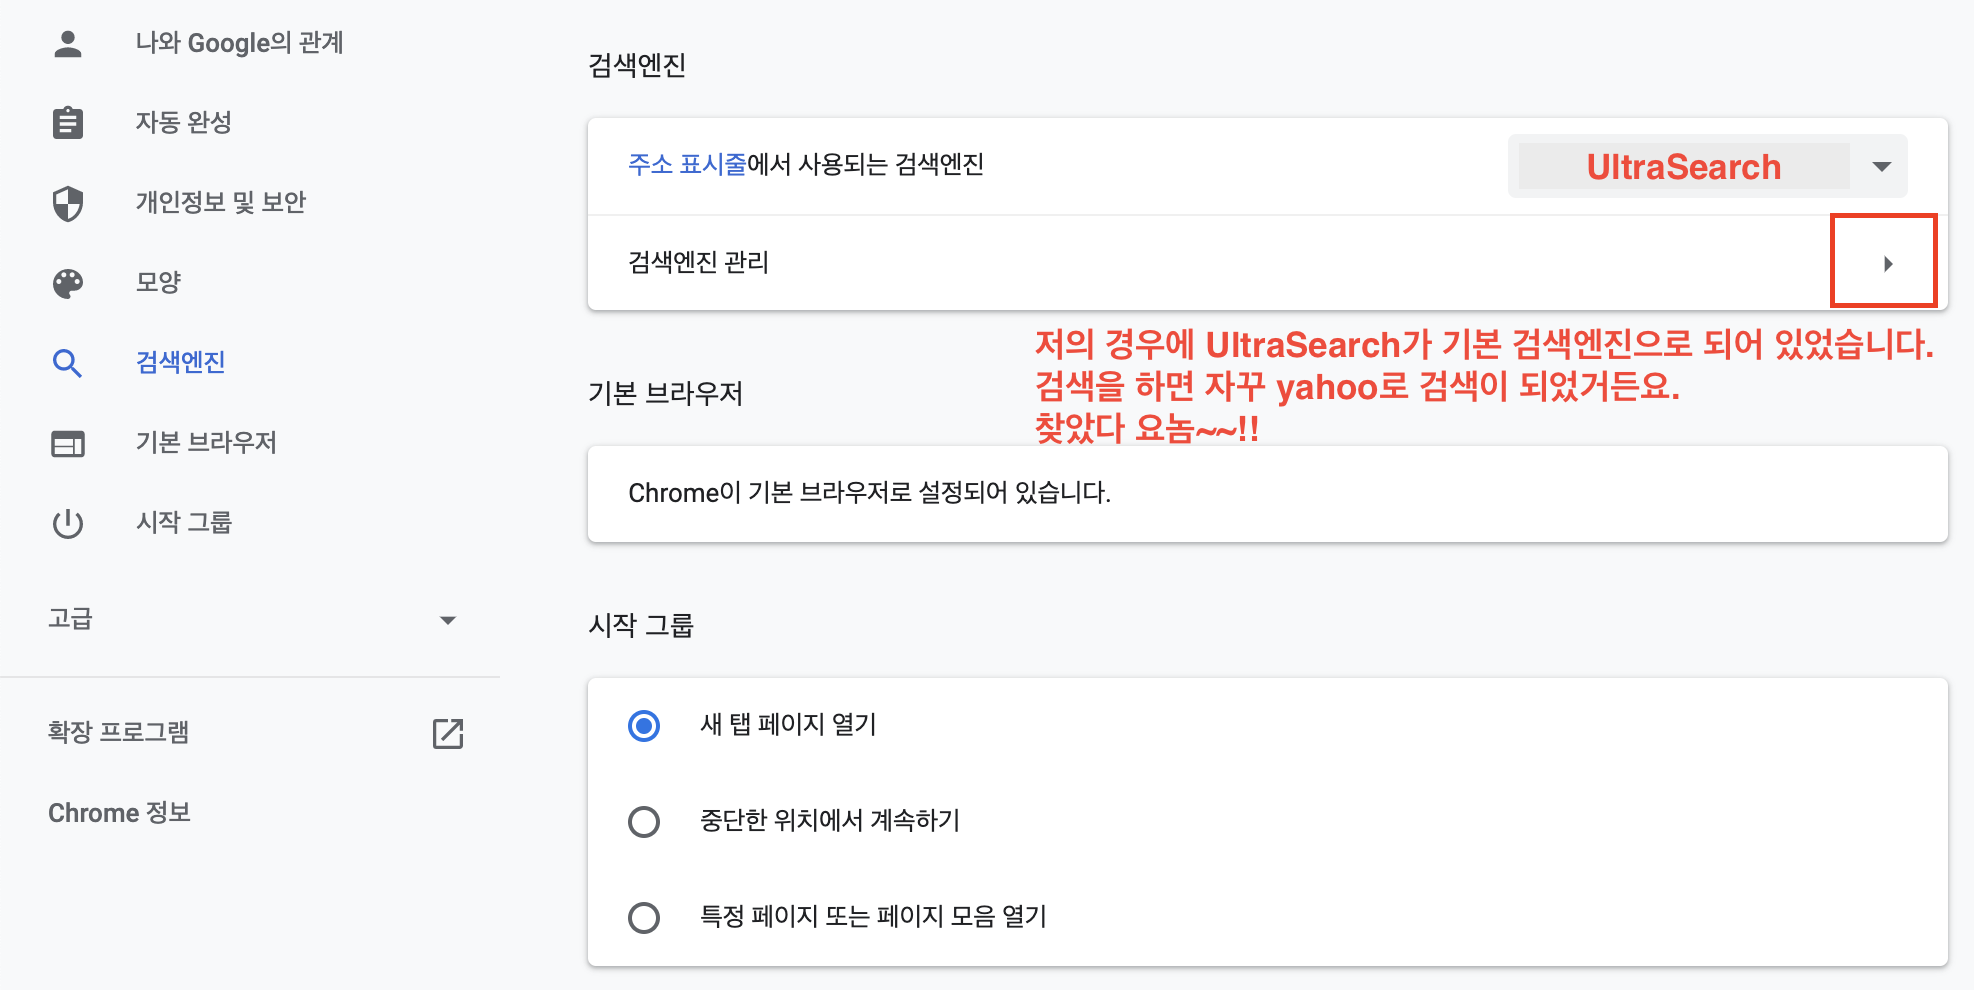
저의 경우에는 UltraSearch 라는 엔진으로 변경되어 있었습니다.

그래서 이를 Google검색엔진으로 다시 변경해줬습니다.


아래와 같이 검색엔진쪽으로 가보니 이상한 검색엔진이 선택되어 있었습니다.

해서 해당 선택엔진을 Google로 바꿔주기 위해서 "검색엔진 관리" 메뉴로 들어가서 Google을 제외하고 다 지웠습니다


저의 경우에는 기본 검색엔진에 Google, yahoo,  naver  가 존재했지만 Google을 빼고 삭제했습니다.


Google로 검색엔진을 바꾼 후의 화면입니다.


5. 구글 브라우저의 권한이 다른 프로그램에게도 줬는지 확인하기

구글 브라우저에서 chrome://policy 로 주소검색을 합니다.

구글 부라우저가 자신의 권한을 다른 프로그램에게도 줬는지를 파악하기 위해서 입니다.


다행히도 저의 경우에는 다른 프로그램에 넘어가지 않았어요.

하지만 위에서 언급했듯이 다른 프로그램에 구글이 자신의 권한을 넘겨주는 경우가 있기 때문에 꼭 찾아서 삭제해야 한다고 하네요.


6. 구글 브라우저에 대해 제대로 설정되어 있는지를 확인하기

defaults read com.google.Chrome

위의 명령어를 command line 에서 직접 타이핑 하시면 

{

    LastRunAppBundlePath = "/Applications/Google Chrome.app";

}

와 같이 뜨는지 확인해 보시길 바랍니다.


정  리


1. 관리자 폴더에 들어가서 의심되는 파일을 삭제합니다.

$ cd /Library/LaunchAgents/

$ cd /Library/LaunchDaemons/


2. 사용자 폴더에 들어가서 의심되는 파일을 삭제합니다.

$ cd ~/Library/LaunchAgents/

$ cd ~/Library/LaunchDaemons/


3. 어플리케이션 suppert파일로 가서 의심되는 파일을 삭제합니다.

$ cd ~/Library/Application\ Support/


4. Chrome 브라우저의 검색엔진중 원하시는 검색엔진을 선택하신 후에 다른 검색엔진은 삭제합니다.

구글 브라우저에서 chrome://settings 로 주소검색을 합니다.

검색엔진이 다른 것으로 변경된게 아니지 확인해봐야 합니다.

저의 경우에는 UltraSearch 라는 엔진으로 변경되어 있었습니다.

그래서 이를 Google검색엔진으로 다시 변경해줬습니다.


5. 구글 브라우저의 권한이 다른 프로그램에게도 줬는지 확인하기

구글 브라우저에서 chrome://policy 로 주소검색을 합니다.

구글 부라우저가 자신의 권한을 다른 프로그램에게도 줬는지를 파악하기 위해서 입니다.


6. 구글 브라우저에 대해 제대로 설정되어 있는지를 확인합니다.

$ defaults read com.google.Chrome

위의 명령어를 command line 에서 직접 타이핑 하시면 

{

    LastRunAppBundlePath = "/Applications/Google Chrome.app";

}

와 같이 뜨는지 확인해 보시길 바랍니다.


아래는 원문 입니다.

확인 해보시기 바랍니다.


How do I know if my Mac is infected?

When you launch a web browser like Safari, Chrome, or Firefox you will not see your regular homepage. Instead, you’ll see the Any Search page. You will then need to uninstall Any Search from your Mac, using the steps below.


How did I get infected?

When you give permission to the seemingly legitimate download to be installed, the bundled hijacker gets permission too. That’s why you should always be certain of what you’re downloading and double-check the website you’ve downloaded it from before you give permission for anything to be installed. Fortunately, it’s not too difficult to remove.


How to remove Any Search from your Mac

1. Go to the Apple menu and click on System Preferences

2. Look for a pane called Profiles. If it’s there, it will be next to Accessibility

3. If it’s there, click on it and look to see if there is a profile called AdminPrefs

4. If it’s there, unlock System Preferences by clicking the padlock and entering your login details, if necessary

5. Click on the AdminPrefs profile and click the ‘-‘ button at the bottom left of the window


Check your Startup items

Malware like the Any Search Manager virus sometimes inserts itself in your startup items so it launches every time you boot your Mac.

1. Go to System Preferences again and click the Users & Groups pane.

2. Unlock it using the padlock, then click on your user name in the left-hand pane.

3. Choose the Login items tab in the main window.

4. Look for anything that seems suspicious.

5. If you find anything, click on it then click the ‘-‘ button at the bottom of the window to remove it.

Alternatively, there is an easier way to remove login items, using CleanMyMac, which scans your Mac for startup processes and allows you to remove them with one click. CleanMyMac also allows you to quickly and easily remove browser extensions, uninstall apps, and reclaim tens of gigabytes of disk space.


Get CleanMyMac here. It's a free version that allows you to remove a few login items completely for free.


Remove Launch Agents and Daemons

1. In the Finder, click on the Go menu and choose Go to Folder.


2. Type /Library/LaunchDaemons

3. Scan the list of .plist files and look for anything with a name you don’t recognize.

4. If you find one, click on it and preview the file, looking for the name of a vendor you recognize.

5. If you don’t find one, drag the file to the Trash.

6. Repeat steps 1-5 for /Library/LaunchAgents and
~/Library/LaunchAgents

7. Once you’ve dragged all the files you want to remove to the Trash, empty it and restart your Mac.


Reset the default page in browser

How to remove Any Search from Safari

1. Once your Mac has restarted, launch Safari

2. Click on the Safari menu and then choose Preferences

3. Click on the Search tab and choose the search engine you want to use

4. Select the General tab and set the Homepage to your preferred home page and the options above it to your preference from the menu options


How to remove Any Search from Chrome

1. Launch Chrome.

2. Click the Settings menu icon (three horizontal lines) on the left of the window or type chrome://settings/  into the address bar.

3. Click On start-up and check the button next to “Open a specific page or set of pages”.

4. Click on the More icon (three vertical dots).

5. Choose Edit and type or paste the URL you want as your start-up page into the text box.

6. Click Save.

7. Click on the Settings icon again.

8. Choose Search Engine.

9. Click Manage search engines and press the More button next to the Any Search engine, then select Remove from list.


10. Click on the dropdown menu next to the “Search engine used in the address bar” and choose the search engine you want to use. Alternatively, click Manage search engines and either add one from the bigger list (by clicking on the More icon and choosing Make Default) or press Add and type in the URL of another search engine.


How to remove AnySearch from Firefox

1. Launch Firefox.

2. Press the settings button (three horizontal lines) on the right-hand side of the toolbar, or type about:preferences into the address bar.

3. Click the Home category and next to “Homepage and new windows” click on the dropdown menu and choose either Firefox Home or Custom URL. If you choose the Custom URL type the URL you want to open into the text box.

4. Click the Search category and in the main window, scroll down to “One-Click Search Engines”. Click on Any Search and press Remove.

5. Scroll back up and click on the menu under the Default Search engine and choose the one you want.


Remove suspicious browser extensions


The final steps for removal [Important]

So far we've cleaned the browser part — what's left is it to root out AnySearch from your system parts associated with Chrome and other browsers. First, we will need to check if AnySearch has seized your Chrome settings. 


STEP 1

Please open Chrome, paste this string into the URL field and press Return: chrome://policy/

You will see something like this:


See the Level and Policy value columns. What's written there?

"Recommended" means AnySearch has gained control over your Chrome settings — need to uninstall Chrome.

"Mandatory" means the malware is sitting deeper and is tied to your user account
— go to step 2 below.

For additional check:

Go to Applications/Terminal
Open Terminal, paste the following command and press Return:
defaults read com.google.Chrome

Now, look through the results. If you see anything related to Anysearch there, you can simply uninstall Chrome and reinstall it anew. The best way to uninstall Chrome along with all leftovers is CleanMyMac's Uninstaller tool.


STEP 2

If that is not the case, please open Finder, go up to the Go menu in the menubar -> Go to Folder, and paste this directory:
/Library/Managed Preferences/[your username]

You should enter [your username] as shown in System Preferences/Users & Groups

Open the folder. Now look for a “com.google.Chrome” file there. 

If you have found it in any of these locations, please open the file in any editor and check if you can find any Anysearch-related information there. Then, manually remove the info from the file and restart your computer.

The same logic applies to Firefox and Safari browsers. 


+ Recent posts