Homebrew 설치하기
macOS에는 macOS 용 패키지 관리자 Homebrew가 있습니다.
Homebrew를 이용하면 설정 과정이 단순하고, 환경변수 설정이 필요없고, 관리하기 편리하기 때문입니다.
터미널에 아래의 명령어 입력하여 Homebrew 를 설치합니다.
/usr/bin/ruby -e "$(curl -fsSL https://raw.githubusercontent.com/Homebrew/install/master/install)"
"Press RETURN to continue or any other key to abort" 라는 문장이 뜨면, 엔터키(리턴키)를 눌러준다.
password에는 mac의 비밀번호를 입력해 주면 됩니다.
비밀번호를 입력하지 않으면 비밀번호 없이 설치가 됩니다.
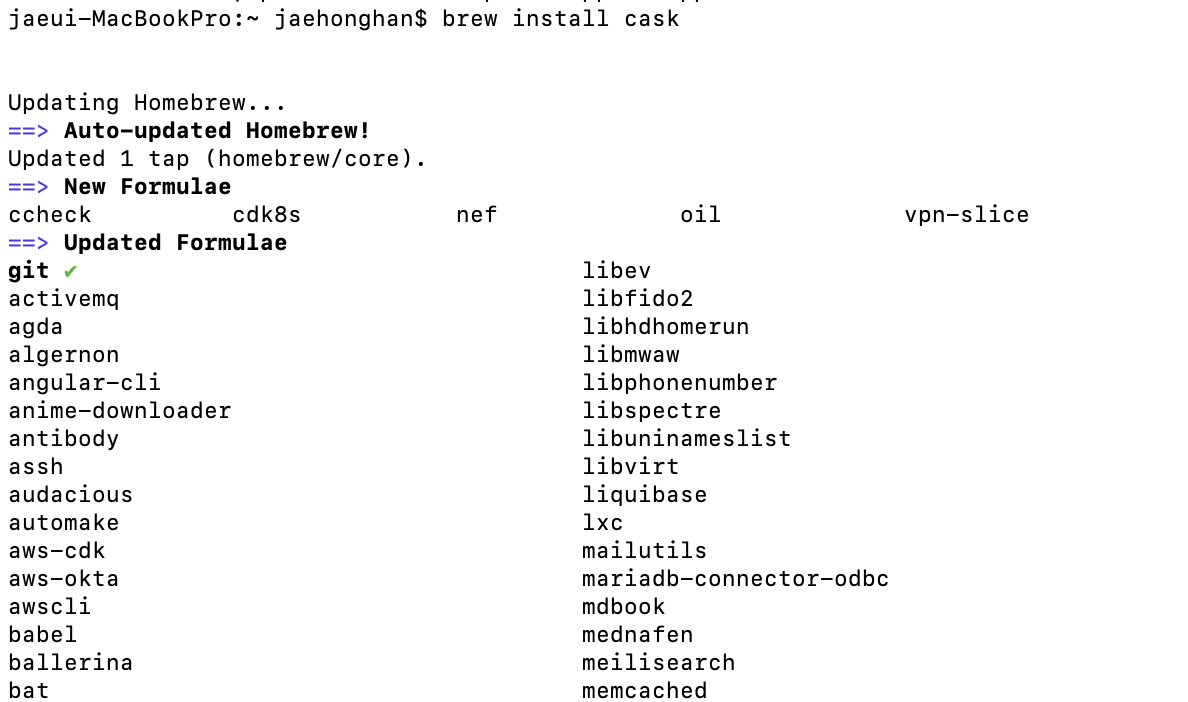
아래의 명령어로 cask 패키지(Safari, Chrome, Word 등과 같이 그래픽을 통해 작업하는 프로그램을 설치할 수 있게 해주는 패키지)를 설치해 줍니다.
brew install cask

Homebrew를 통해 프로그램을 설치하기 전엔 항상 아래의 명령어로 업데이트가 있는지 확인 후 진행합니다.
brew update
MySQL 설치
1. brew update를 통해 최신 버전으로 업데이트를 해줍니다.
2. brew search mysql을 통해 설치할 MySQL 버전을 확인해 줍니다.
3. brew install mysql을 통해 원하는 버전의 MySQL을 설치해 줍니다. (이 경우 최신버전)
// 최신 버전으로 업데이트를 해줍니다.
brew update

// 설치할 MySQL 버전을 확인해 줍니다.
brew search mysql

// 원하는 버전의 MySQL을 설치해 줍니다. (이 경우 최신버전)
brew install mysql
mysql 설치할 버전을 찾아줍니다.
$ brew search mysql

mysql 서버를 설치합니다.
$ brew install mysql

Homebrew 서비스 확인 :: brew services list / 설치 디렉토리 확인 / brew 서비스 시작
실행 중인 홈브루 서비스를 확인합니다.
$ brew services list
mysql 서버가 제대로 설치된 것을 확인할 수 있고, 서비스가 중지되어 있는 것을 확인할 수 있습니다.
jaeui-MacBookPro:~ jaehonghan$ brew services list
==> Tapping homebrew/services
Cloning into '/usr/local/Homebrew/Library/Taps/homebrew/homebrew-services'...
remote: Enumerating objects: 691, done.
remote: Total 691 (delta 0), reused 0 (delta 0), pack-reused 691
Receiving objects: 100% (691/691), 187.09 KiB | 728.00 KiB/s, done.
Resolving deltas: 100% (272/272), done.
Tapped 1 command (40 files, 260.7KB).
Name    Status  User Plist
emacs   stopped
mysql   stopped
unbound stopped
설치된 MySQL 데이터 디렉터리를 확인합니다.
$ ls -al /usr/local/var/mysql
jaeui-MacBookPro:~ jaehonghan$ ls -al /usr/local/var/mysql
total 317552
drwxr-x---    2 jaehonghan  admin        64  3 25 21:03 #innodb_temp
drwxr-xr-x   26 jaehonghan  admin       832  3 25 21:03 .
drwxrwxr-x    4 jaehonghan  admin       128  3 25 20:54 ..
-rw-r-----    1 jaehonghan  admin        56  3 25 20:54 auto.cnf
-rw-r-----    1 jaehonghan  admin       178  3 25 21:01 binlog.000001
-rw-r-----    1 jaehonghan  admin       178  3 25 21:03 binlog.000002
-rw-r-----    1 jaehonghan  admin        32  3 25 21:01 binlog.index
-rw-------    1 jaehonghan  admin      1676  3 25 20:54 ca-key.pem
-rw-r--r--    1 jaehonghan  admin      1112  3 25 20:54 ca.pem
-rw-r--r--    1 jaehonghan  admin      1112  3 25 20:54 client-cert.pem
-rw-------    1 jaehonghan  admin      1676  3 25 20:54 client-key.pem
-rw-r-----    1 jaehonghan  admin      3345  3 25 21:03 ib_buffer_pool
-rw-r-----    1 jaehonghan  admin  50331648  3 25 21:03 ib_logfile0
-rw-r-----    1 jaehonghan  admin  50331648  3 25 20:54 ib_logfile1
-rw-r-----    1 jaehonghan  admin  12582912  3 25 21:03 ibdata1
-rw-r-----    1 jaehonghan  admin      2422  3 25 21:03 jaeui-MacBookPro.local.err
drwxr-x---    8 jaehonghan  admin       256  3 25 20:54 mysql
-rw-r-----    1 jaehonghan  admin  28311552  3 25 21:01 mysql.ibd
drwxr-x---  105 jaehonghan  admin      3360  3 25 20:54 performance_schema
-rw-------    1 jaehonghan  admin      1680  3 25 20:54 private_key.pem
-rw-r--r--    1 jaehonghan  admin       452  3 25 20:54 public_key.pem
-rw-r--r--    1 jaehonghan  admin      1112  3 25 20:54 server-cert.pem
-rw-------    1 jaehonghan  admin      1676  3 25 20:54 server-key.pem
drwxr-x---    3 jaehonghan  admin        96  3 25 20:54 sys
-rw-r-----    1 jaehonghan  admin  10485760  3 25 21:03 undo_001
-rw-r-----    1 jaehonghan  admin  10485760  3 25 21:01 undo_002
Homebrew MySQL 서비스 시작합니다.
$ brew services start mysql
jaeui-MacBookPro:~ jaehonghan$ brew services start mysql
==> Successfully started `mysql` (label: homebrew.mxcl.mysql)
jaeui-MacBookPro:~ jaehonghan$ brew services list
Name    Status  User       Plist
emacs   stopped
mysql   started jaehonghan /Users/jaehonghan/Library/LaunchAgents/homebrew.mxcl.mysql.plist
unbound stopped
MySQL 실행 및 ROOT 비밀번호 설정
내 환경설정 파일에 PATH를 설정해 주세요. mysql 부분을 설정하시고 저장하세요.
$ vi ~/.bash_profile
$ vi ~/.bash_profile


# mysql 설정부분
export PATH="/usr/local/opt/mysql/bin:$PATH"
export LDFLAGS="-L/usr/local/opt/mysql/lib"
export CPPFLAGS="-I/usr/local/opt/mysql/include"


:wq
설정된 내용을 적용시켜 줍니다.
$ source ~/.bash_profile
mysql 서버를 실행합니다.
$ mysql.server start
시작해서 SUCCESS! 메세지가 뜨면 mysql서버에 접속해 봅니다. (비밀번호 없이 접속이 가능합니다.)
$ mysql -uroot
jaeui-MacBookPro:~ jaehonghan$ mysql.server start
Starting MySQL
 SUCCESS!

// Ctrl+ C 를 눌러주세요. 백그라운드로 실행되니 안심하세요.

jaeui-MacBookPro:~ jaehonghan$ mysql -uroot
Welcome to the MySQL monitor.  Commands end with ; or \g.
Your MySQL connection id is 8
Server version: 8.0.19 Homebrew

Copyright (c) 2000, 2020, Oracle and/or its affiliates. All rights reserved.

Oracle is a registered trademark of Oracle Corporation and/or its
affiliates. Other names may be trademarks of their respective
owners.

Type 'help;' or '\h' for help. Type '\c' to clear the current input statement.

mysql> exit
MySQL ROOT 비밀번호 설정
1. mysql.server start 명령어로 MySQL 서버를 실행시킵니다.
2. mysql_secure_installation 명령어로 MySQL ROOT비밀번호를 설정합니다.
-
Would you like to setup VALIDATE PASSWORD component?(비밀번호 가이드 설정에 대한 질문)
yes: 복잡한 비밀번호
no: 쉬운 비밀번호 --> 쉬운 비밀번호로 세팅해주세요. -
Remove anonymous users? (Press y|Y for Yes. any other key for No)(사용자 설정에 관한 질문)
yes: 접속시 -u 옵션필요
no: 접속시 -u 옵션 불필요 -
Disallow root login remotely? (Press y|Y for Yes, any other key for No)(다른 IP에서 root 아이디로 원격접속을 설정)
yes: 원격접속 불가능
no: 원격접속 가능 -
Remove test database and access to it? (Press y|Y for Yes, any other key for No)(테스트 데이터베이스 설정)
yes: 테스트 데이터베이스 제거
no: 테스트 데이터베이스 유지 -
Reload privilege tables now? (Press y|Y for Yes, any other key for No)(변경된 권한을 테이블에 적용)
yes: 적용
no: 미적용
$ mysql_secure_installation

Securing the MySQL server deployment.

Connecting to MySQL using a blank password.

VALIDATE PASSWORD COMPONENT can be used to test passwords
and improve security. It checks the strength of password
and allows the users to set only those passwords which are
secure enough. Would you like to setup VALIDATE PASSWORD component?

Press y|Y for Yes, any other key for No: N
Please set the password for root here.

New password:

Re-enter new password:
By default, a MySQL installation has an anonymous user,
allowing anyone to log into MySQL without having to have
a user account created for them. This is intended only for
testing, and to make the installation go a bit smoother.
You should remove them before moving into a production
environment.

Remove anonymous users? (Press y|Y for Yes, any other key for No) : Y
Success.


Normally, root should only be allowed to connect from
'localhost'. This ensures that someone cannot guess at
the root password from the network.

Disallow root login remotely? (Press y|Y for Yes, any other key for No) : Y
Success.

By default, MySQL comes with a database named 'test' that
anyone can access. This is also intended only for testing,
and should be removed before moving into a production
environment.


Remove test database and access to it? (Press y|Y for Yes, any other key for No) : Y
 - Dropping test database...
Success.

 - Removing privileges on test database...
Success.

Reloading the privilege tables will ensure that all changes
made so far will take effect immediately.

Reload privilege tables now? (Press y|Y for Yes, any other key for No) : Y
Success.

All done!
위와 같이 해주시면 root 비밀번호를 간단히 적용하실 수 있습니다.
특히
VALIDATE PASSWORD COMPONENT can be used to test passwords and improve security. It checks the strength of password
and allows the users to set only those passwords which are secure enough. Would you like to setup VALIDATE PASSWORD component?
(VALIDATE PASSWORD COMPONENT를 사용하여 비밀번호를 테스트하고 보안을 향상시킬 수 있습니다. 이 체크는 암호의 강도와 충분히 안전한 암호를 설정하여 사용자에게 허용합니다. VALIDATE PASSWORD 구성 요소를 설정 하시겠습니까?)
이 부분에서 "No" 나 "N" 을 눌러주세요.
그렇지 않으시면 아주 긴 비밀번호를 입력해야 할 수도 있습니다.
저의 경우에는 20자 짜리 길이의 비밀번호를 입력했는데요 예상강도가 50이라고 하면서 더 복잡한 암호를 요구하였습니다.
Estimated strength of the password: 50

이런 경우에는 mysql을 재설치하였습니다.
재설치 방법은 아래에 정리해 뒀습니다.
mysql 서버 접속해봅니다.
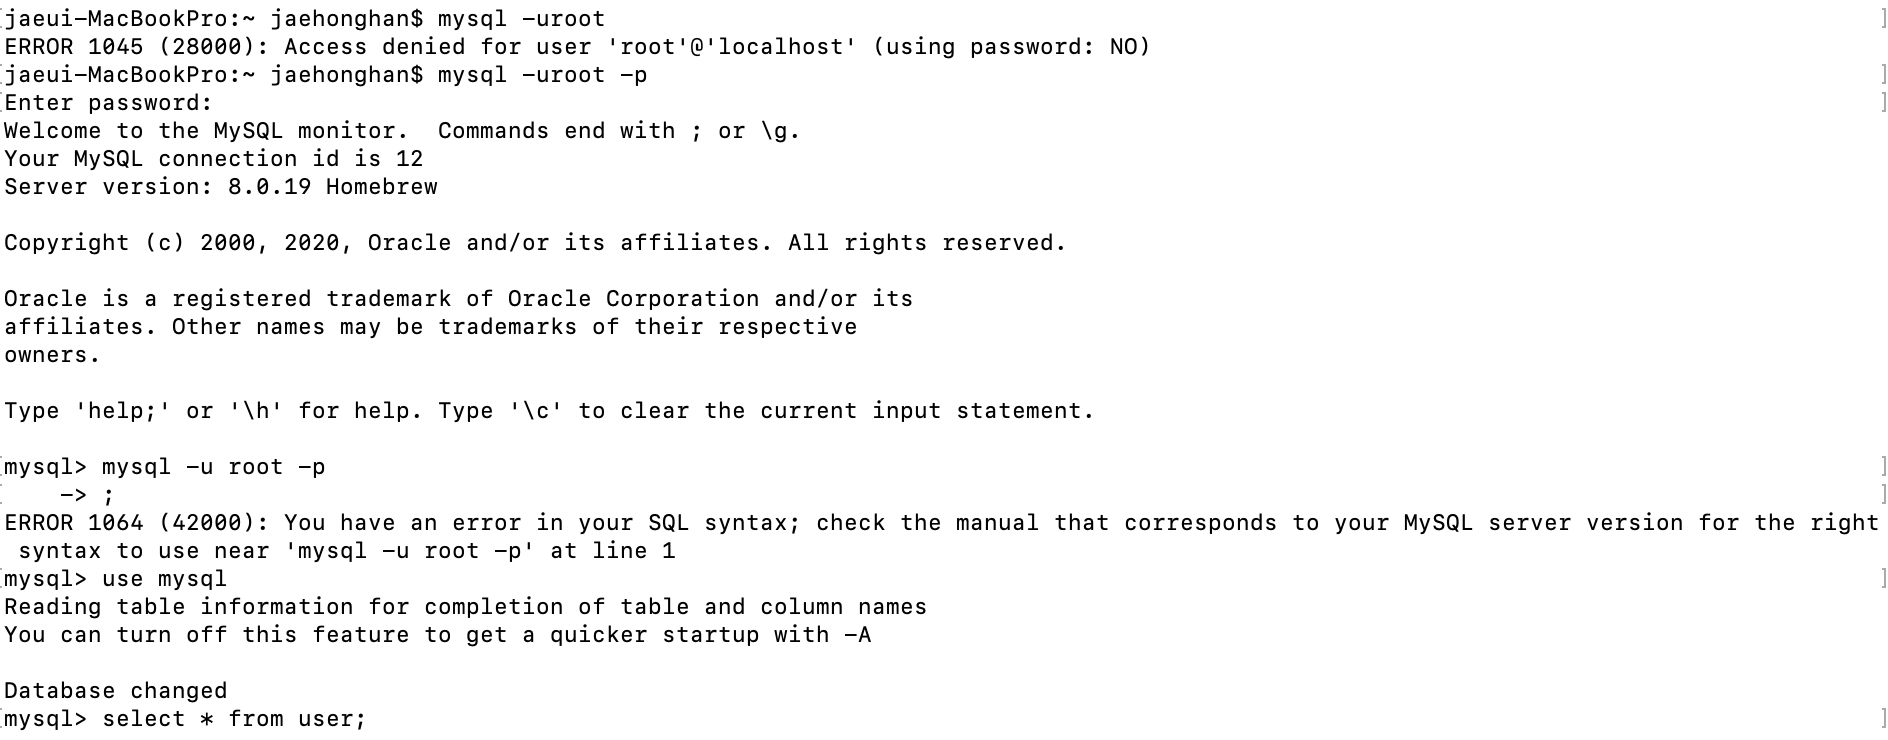
$ mysql -uroot 로 하면 에러가 발생합니다.
$ mysql -uroot -p로 해서 설정된 비밀번호를 입력합니다.

mysql 로그아웃을 해보세요
mysql >exit 또는 mysql> quit
mysql 서버를 종료 해보세요.
$ mysql.server stop
MySQL 삭제 및 재설치 하기
brew 서비스에서 mysql 서비스를 중지시킵니다.
$ brew services stop mysql
mysql 설치 디렉토리를 삭제합니다.
$ ll /usr/local/var/mysql
$ rm -rf /usr/local/var/mysql
sudo rm -rf /usr/local/var/mysql
sudo rm -rf /usr/local/bin/mysql*
sudo rm -rf /usr/local/Cellar/mysql
brew 에서 mysql을 언인스톨시킵니다.
$ brew uninstall mysql
brew 에서 서비스가 삭제되었는지 확인해 봅니다.
$ brew services list
brew 에서 mysql을 인스톨합니다.
$ brew install mysql
brew 에서 서비스가 설치되었는지 확인해 봅니다.
$ brew services list
$ brew services stop mysql
Stopping `mysql`... (might take a while)
==> Successfully stopped `mysql` (label: homebrew.mxcl.mysql)
$
$ ll /usr/local/var/mysql
total 221584
drwxr-xr-x  7 jaehonghan  admin       224  3 25 21:10 .
drwxrwxr-x  4 jaehonghan  admin       128  3 25 21:04 ..
-rw-r-----  1 jaehonghan  admin  12582912  3 25 21:10 ibdata1
-rw-r-----  1 jaehonghan  admin  50331648  3 25 21:04 ib_logfile1
-rw-r-----  1 jaehonghan  admin       217  3 25 21:10 ib_buffer_pool
-rw-r-----  1 jaehonghan  admin  50331648  3 25 21:10 ib_logfile0
-rw-r-----  1 jaehonghan  admin    152279  3 25 21:10 jaeui-MacBookPro.local.err
$ rm -rf /usr/local/var/mysql

$ ll /usr/local/var/mysql

$ brew uninstall mysql

Uninstalling /usr/local/Cellar/mysql... (319 files, 232.3MB)


$ brew services list
Name    Status  User Plist
emacs   stopped
unbound stopped

$ brew install mysql
==> Downloading https://homebrew.bintray.com/bottles/mysql-8.0.19.catalina.bottle.2.tar.gz
Already downloaded: /Users/jaehonghan/Library/Caches/Homebrew/downloads/16119cce36310b0d4f34d54a3a0dd701d068e946c1d4bd4c7bb409b9f9899760--mysql-8.0.19.catalina.bottle.2.tar.gz
==> Pouring mysql-8.0.19.catalina.bottle.2.tar.gz
==> /usr/local/Cellar/mysql/8.0.19/bin/mysqld --initialize-insecure --user=jaehonghan --basedir=/usr/local/Cellar/mysql/8.0.19 --datad
==> Caveats
We've installed your MySQL database without a root password. To secure it run:
    mysql_secure_installation

MySQL is configured to only allow connections from localhost by default

To connect run:
    mysql -uroot

To have launchd start mysql now and restart at login:
  brew services start mysql
Or, if you don't want/need a background service you can just run:
  mysql.server start
==> Summary
🍺  /usr/local/Cellar/mysql/8.0.19: 286 files, 289.2MB

$ brew services list
Name    Status  User Plist
emacs   stopped
mysql   stopped
unbound stopped
참고URL
mac에 MySQL 설치하기
https://velog.io/@max9106/mac%EC%97%90-MySQL-%EC%84%A4%EC%B9%98%ED%95%98%EA%B8%B0-4ck17gzjk3
OS X에서 MySQL을 잘못 설치했을 때 다시 설치하는 방법


